
Animation can bring your designs to life, adding an extra layer of interactivity and engagement to your projects.
Figma, a powerful design tool, offers various features to help you create animations easily and efficiently.
In this article, we will discuss the fundamentals of animation in Figma and walk you through the process of creating animations using Figma’s powerful features.
Understanding Animation in Figma
Figma’s animation capabilities mainly revolve around its prototyping features. You can create smooth transitions between frames, animate object properties like position and size, and even use Smart Animate to create more complex animations with minimal effort. Here’s a quick overview of the types of animations you can create in Figma:
- Transitions: Apply simple animations between frames, such as fade, slide, or push.
- Property animations: Animate changes in object properties, like size, position, rotation, and opacity.
- Smart Animate: Automatically animate differences between two frames, such as the movement or resizing of objects, making it easier to create complex animations.
Now that you have a basic understanding of animation in Figma, let’s dive into the process of creating animations.
Creating Animations in Figma
Follow these steps to create animations in Figma:
1. Design Your Frames
Start by designing the frames you want to animate. Ensure that your objects and layers are well-organized and appropriately named, as this will make it easier to create animations later on.
2. Switch to Prototype Mode
Click the “Prototype” tab in the top-right corner of the Figma interface to enter Prototype mode. This mode allows you to create connections between frames and add interactivity, including animations.
3. Create Connections Between Frames
Select an object or layer on your first frame that should trigger the animation, such as a button or a menu item. In the right-hand panel, click the “+” icon next to the “Interactions” section. Drag the connection handle (circle with a plus sign) to the target frame you want to animate to.
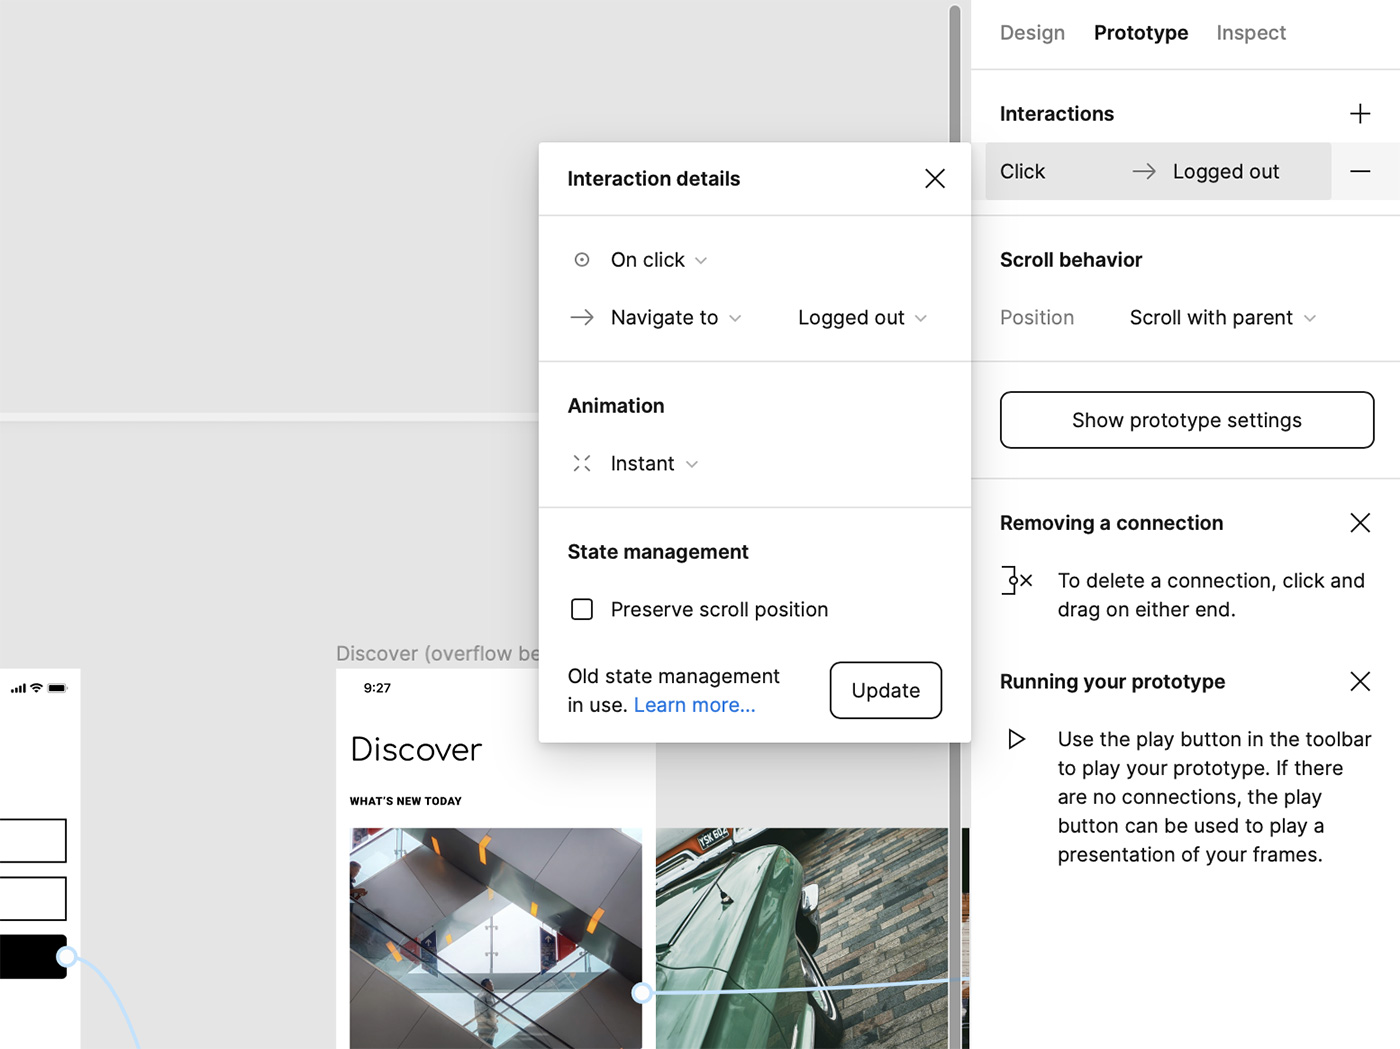
4. Configure the Animation
After connecting the frames, configure the animation details in the right-hand panel. Choose an interaction type (e.g., “On Click” or “On Hover”), set the desired animation or transition (e.g., “Instant,” “Dissolve,” or “Smart Animate”), and adjust any additional options, such as duration and easing.
For more advanced animations, you can use the “Smart Animate” option, which will automatically animate the differences between the connected frames. Ensure that the objects you want to animate have the same layer name in both frames to take full advantage of Smart Animate.
5. Preview Your Animation
To preview your animation, click the “Present” button in the top-right corner of the Figma interface or press Ctrl + P (Cmd + P on macOS). This will open a new browser window with your interactive prototype. Test the animation to ensure it works as expected and make any necessary adjustments.
6. Iterate and Refine Your Animations
Continue creating connections and configuring animations for all the elements you want to animate in your project. Test and refine your animations to achieve the desired effect and ensure a smooth user experience.
Tips for Animating in Figma
To make the most of Figma’s animation features, keep these tips in mind:
- Keep animations simple and purposeful: Avoid overusing animations or making them too complex, as this can distract from your design’s main purpose. Use animations to enhance the user experience and guide users through your design.
- Maintain consistent timing and easing: Ensure that the duration and easing of your animations are consistent across your project to create a cohesive experience. This helps users become more familiar with the interactions and feel more comfortable navigating your design.
- Use components for repeated animations: If you have elements with similar animations throughout your design, use components and instances to maintain consistency and make updates more manageable.
- Test your animations on different devices: Animations may look and feel different on various devices and screen sizes. Test your animations on multiple devices to ensure they provide a consistent experience for all users.
- Collaborate and gather feedback: Share your animated prototypes with clients, teammates, or stakeholders to gather feedback and make improvements. Figma’s real-time collaboration and commenting features make it easy to work together and iterate on your animations.
By following these steps and tips, you can create engaging and effective animations in Figma. Animation can enhance your designs and provide a more dynamic and interactive user experience. With Figma’s powerful animation features, you can bring your designs to life and create captivating projects that stand out from the competition.