
Blending is an essential technique in digital painting that allows artists to create smooth transitions between colors, add depth and texture, and achieve a more natural, realistic look in their artwork. Procreate, a popular digital painting app for the iPad, offers various tools and techniques for blending.
This article will discuss blending in Procreate, focusing on the Smudge tool, Gaussian Blur, and blending brushes.
Additionally, we will share some tips on blending effectively in Procreate to enhance your digital artwork.
What is Blending?
Blending is the process of mixing different colors or values on a canvas, creating a seamless transition between them. It can be used to soften edges, create gradients, or add depth to your artwork. Blending is a crucial technique in digital painting, as it helps artists achieve a more realistic and visually appealing result.
Blending with the Smudge Tool
The Smudge tool in Procreate is a versatile option for blending colors directly on your canvas. It allows you to mix colors by simulating the action of dragging or smudging paint with your finger or a brush.
Using the Smudge Tool
- Open your Procreate project and select the layer where you want to blend colors.
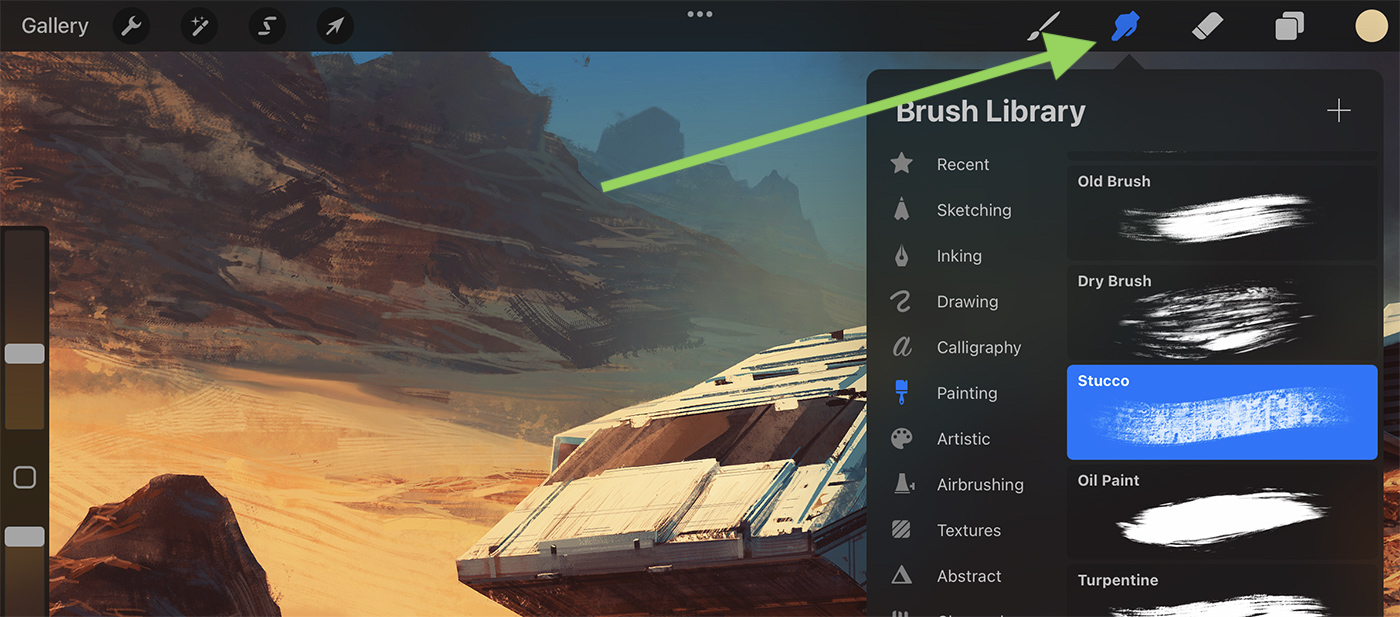
- Select the Smudge tool from the toolbar located at the top right corner of the screen.
- Choose a brush from the Brush Library for your Smudge tool. Experiment with different brushes to achieve the desired blending effect.
- Adjust the size and opacity of the Smudge tool using the sliders in the toolbar.
- Drag the Smudge tool across the canvas, blending the colors as needed. The longer you drag the tool, the more the colors will blend together.
Tips for Using the Smudge Tool
- Work with a low opacity for a subtle blending effect and gradually increase the opacity if needed.
- Use a small brush size for detailed areas and a larger brush size for broader blending.
- Experiment with different brushes to achieve a variety of blending effects.
Blending with Gaussian Blur
Gaussian Blur is an effect in Procreate that can be used to blend colors by applying a controlled blur to your artwork. This method is useful for creating smooth gradients and softening transitions between colors.
Using Gaussian Blur
- Open your Procreate project and select the layer where you want to apply the Gaussian Blur effect.
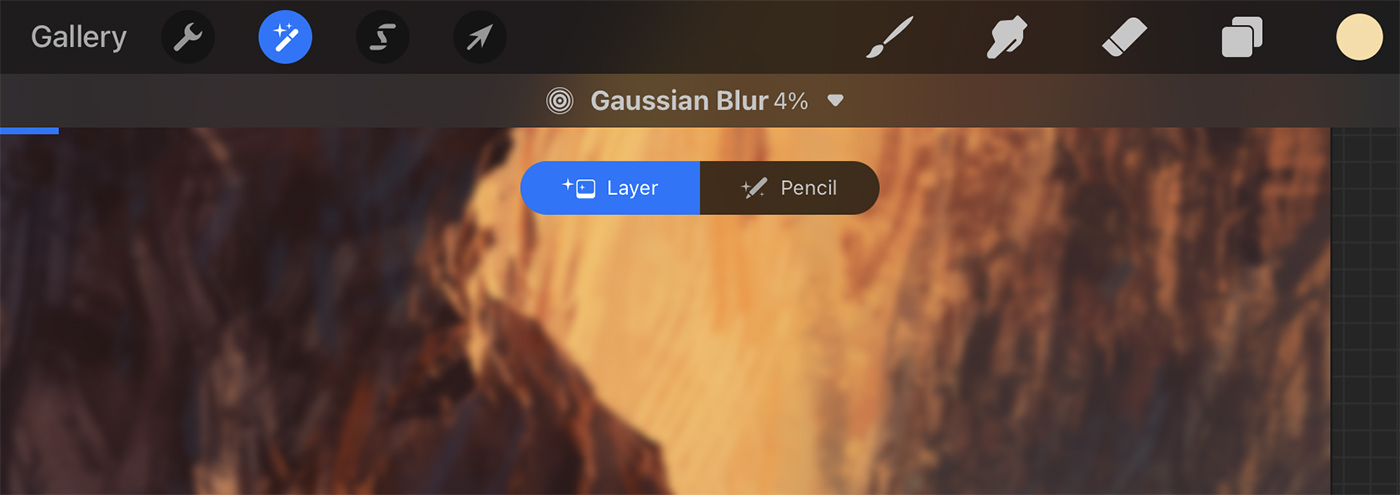
- In the toolbar at the top left corner of the screen, tap the Adjustments icon (a magic wand).
- Choose Gaussian Blur from the list of adjustments.
- Slide your finger or Apple Pencil across the screen to adjust the intensity of the blur. Sliding to the right increases the blur, while sliding to the left decreases it.
- Tap the “Done” button to apply the effect.
Tips for Using Gaussian Blur
- Use Gaussian Blur sparingly to avoid losing too much detail in your artwork.
- Apply the effect to a separate layer to maintain control over the intensity and preserve the original layer.
Blending with Brushes
In addition to the Smudge tool and Gaussian Blur, you can use specialized blending brushes in Procreate to achieve various blending effects. These brushes are designed to mix colors on the canvas, simulating the behavior of traditional paint.
Using Blending Brushes
- Open your Procreate project and select the layer where you want to blend colors.
- Tap the Brush tool in the toolbar at the top right corner of the screen.
- Choose a blending brush from the Brush Library or import custom blending brushes. The default Procreate brush set includes several blending brushes, such as the Wet Acrylic and Soft Brush, which can be found in the Painting and Airbrushing categories.
- Adjust the size and opacity of the blending brush using the sliders in the toolbar.
- Paint over the area where you want to blend colors, using light pressure for a subtle effect and heavier pressure for a more intense blend.
Tips for Using Blending Brushes
- Experiment with various blending brushes to find the ones that work best for your style and the specific effect you’re trying to achieve.
- Adjust the brush settings, such as flow and opacity, to fine-tune the blending effect.
- Blend colors gradually by using a low opacity and building up the effect in multiple layers.
Conclusion
Blending in Procreate is an essential skill that can significantly enhance your digital artwork. By mastering the use of the Smudge tool, Gaussian Blur, and blending brushes, you can create smooth transitions between colors, add depth and texture to your paintings, and achieve a more natural, realistic look.
Don’t forget to experiment with different tools, brushes, and settings to find the best blending techniques for your unique style and artistic goals. With practice and patience, you’ll soon become a blending pro in Procreate.