
As more WordPress websites are built using the Gutenberg block editor, the wish list for new features grows along with it. That makes sense, as heavier usage tends to expose any shortcomings or “wouldn’t it be great if…” types of ideas.
The editor is improving all the time. But even if a missing feature doesn’t make its way into WordPress core, the developer community is free to build their own solutions. Take, for example, the ability to hide a specific block or schedule it to display at certain times.
This could come in handy for a number of common scenarios. For one, it allows you to work on a piece of content without making it public until you’re ready to launch. Or set up a limited-time event such as a contest or meeting that requires some temporary content to display.
One solution for achieving this is Block Visibility, a free WordPress plugin that allows content creators to take control of their blocks. Any blocks within a page can be hidden or displayed based on a variety of criteria. Plus, it integrates seamlessly into the block editor’s UI.
Want to learn more? Let’s take a look at a few different ways you might utilize Block Visibility on your own WordPress website.
Getting Started
Before we dig into what Block Visibility can do, there are a few prerequisites to keep in mind. Thankfully, they’re quite minimal.
First, you’ll need a WordPress website that utilizes the Gutenberg block editor. If you happen to have the Classic Editor plugin installed, make sure you’ve set it to allow for switching between editors.

Beyond that, you’ll want to install and activate a copy of Block Visibility. Inside WordPress, navigate to Plugins > Add New and search for the plugin.
That’s all there is to it!
Navigating Block Visibility
At its most basic, Block Visibility enables you to simply hide one or more blocks on a page or post. But there’s also a fairly comprehensive UI included with the plugin. Therefore, it’s good to know your way around.
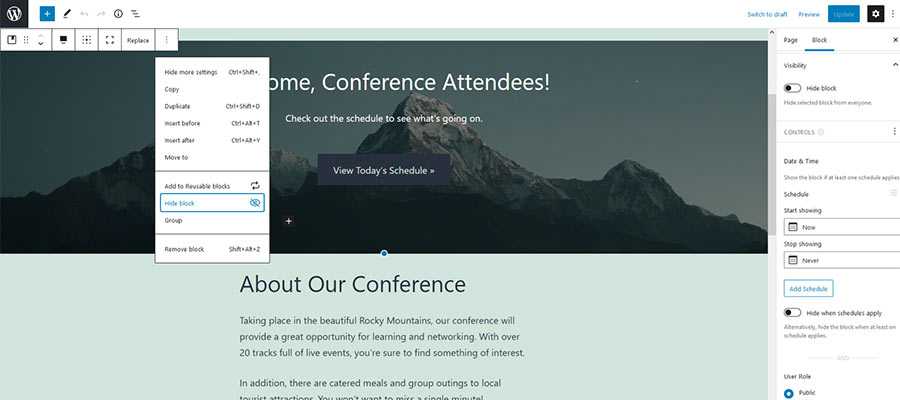
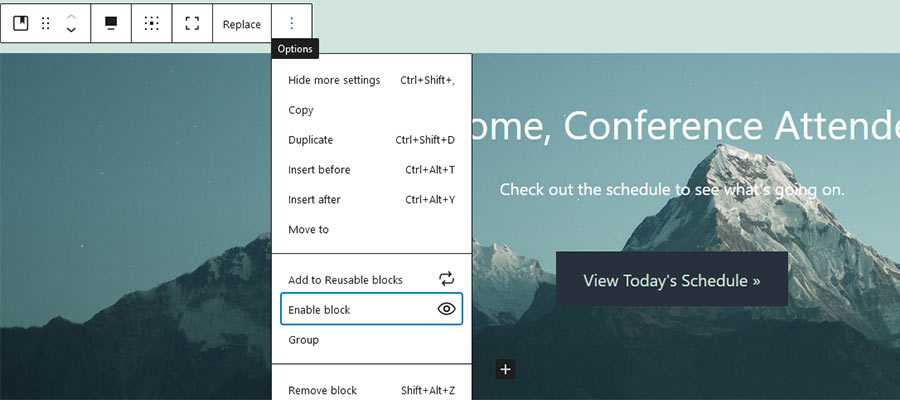
First, within each block’s Options menu, there is a “Hide block” entry. It does exactly what it says – no need for a lot of explanation. Although, we’ll provide a demonstration below.
Then, on block editor’s Settings sidebar, there is a “Visibility” panel. This is where things get a bit more detailed.
This section allows you to hide or display a block based on a number of scenarios. Criteria such as user role, screen size and date/time are available. In addition, block visibility can be controlled based on the value of custom fields as well.
Plugin Settings
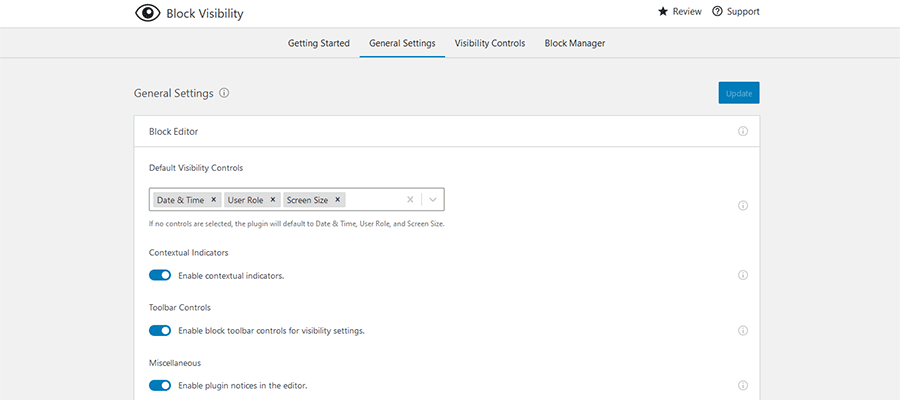
We should also note that you can further tweak what Block Visibility can do via its settings screen, Settings > Block Visibility.
The settings screen lets you choose which block types have visibility controls, the types of visibility criteria available and which user roles can make changes. You can even set breakpoints for controlling visibility via screen size.
If you need a helping hand, the included “Getting Started” tab will fill you in on common tasks.
A Multitude of Ways to Hide a Gutenberg Block
Now that we’ve covered the basics of Block Visibility, it’s time to see it in action. The plugin’s functionality ranges from super-simple to semi-complex, depending on your needs.
Here are a few examples of the various ways to hide a Gutenberg block.
Just Hide a Block
To hide a block from the front end of your website, click on the “Hide block” entry on the block’s Options menu.
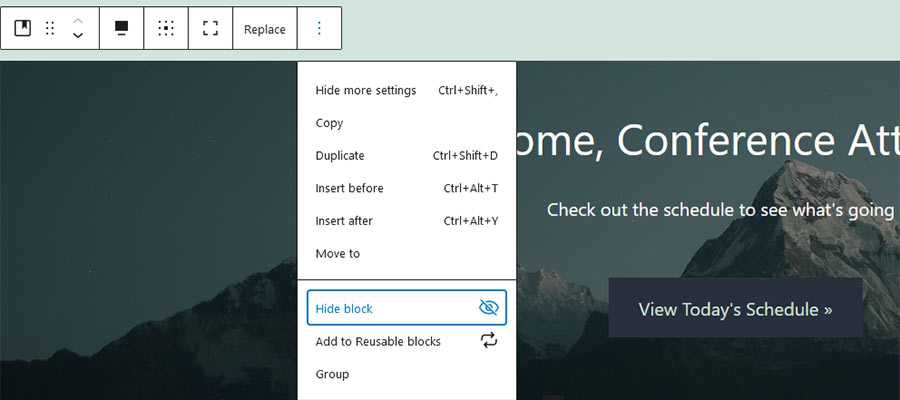
A dialog will appear confirming that the block has been hidden. In addition, the block in question will be shaded so as to look inactive. A decorative icon will also appear on the upper right corner. Just remember to save your changes!
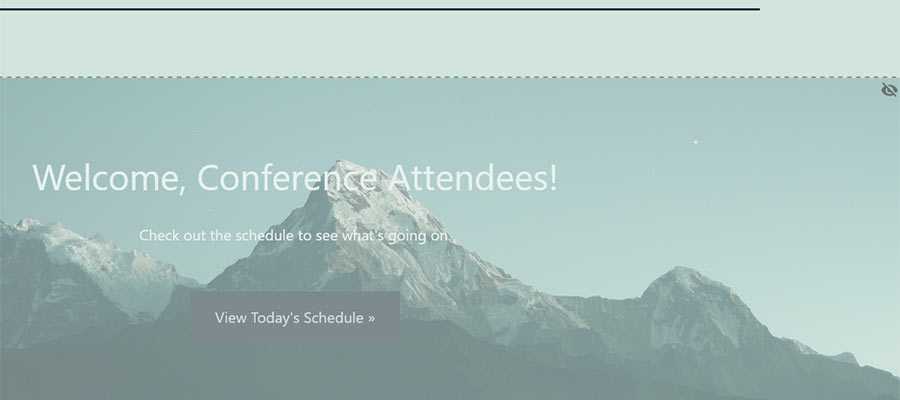
On the front end, our example Cover block has indeed been hidden. In fact, the block is not rendered at all. Thus, there’s no negative impact on performance.
As an aside, the only time a hidden block will appear in the source code is when you’ve chosen to hide it based on screen size. In all other scenarios, it will be completely removed from the front end.
Conditionally Hide or Display a Block
To hide or display a block based on conditional criteria, you’ll want to utilize the “Visibility” panel. It can be found within the Settings sidebar on the right of the screen. Click on the block you want to modify and open up the panel to get started.
Inside, there are a number of ways to set the visibility of a block:
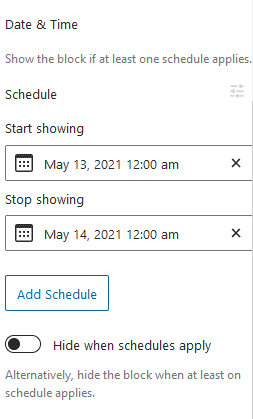
Date & Time
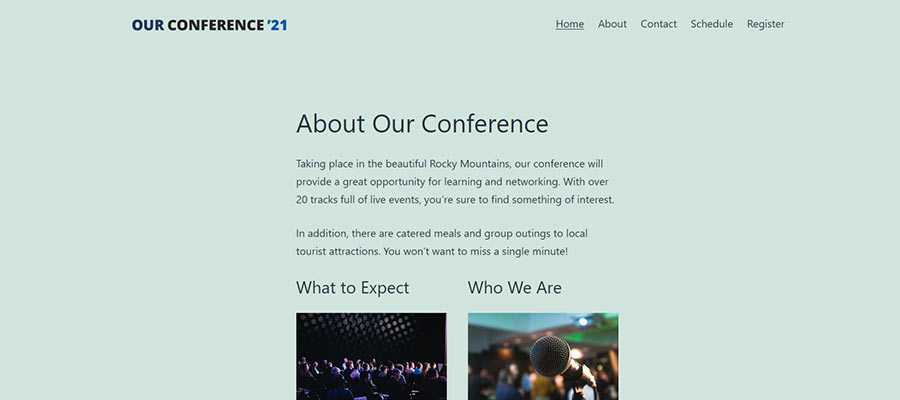
This setting allows you to display (or hide) a block within a specific date and time range. On our fictional conference website, we’ve chosen to display the selected Cover block for just 24 hours. Note that multiple schedules can be set per block.
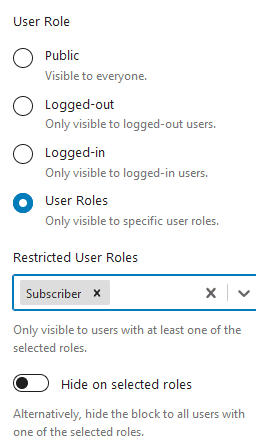
User Roles
It’s also possible to display a block based on a user’s role or login status. The default setting is “Public”, which displays to everyone. However, you may also choose to display a block to logged-in or logged-out users, or just to those who belong to a specific user role.
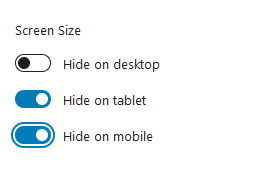
Screen Size
For occasions when you want to target only specific screen sizes, Block Visibility makes it easy to do so. You can choose to hide blocks on desktop, tablet or mobile devices. Custom breakpoints can be set in the aforementioned Settings > Block Visibility screen within WordPress.
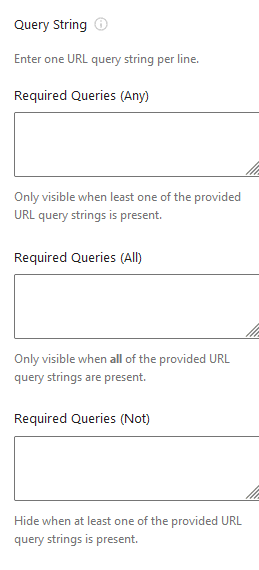
Query String
Hidden by default, the Query String setting can display a block based on the presence of any particular query strings in the post’s URL. You can enable this setting via the settings screen (Settings > Block Visibility) or by clicking on the “Controls” link within the Visibility panel. The plugin documentation has a quick tutorial on the subject.
It’s also worth mentioning that you can combine one or more of the above conditions to exercise fine-grain control over a block’s visibility. For instance, you might schedule a block to display within a specific time range AND only on desktop devices. That’s just one of many possibilities, however.
Display a Hidden Block
Whenever you want display a hidden block, go back to its Options menu and select “Enable block”. Alternatively, you may also uncheck the “Hide block” setting within the Visibility panel.
Take Control of Your WordPress Gutenberg Blocks
On the surface, Block Visibility may seem like a fairly simple WordPress plugin. Yet it can help you perform some advanced functions with only a few clicks. Previously, it would have taken quite a bit of custom code to pull off similar feats with your site’s content.
Plus, hiding a block is one of those things that might be considered a missing feature of Gutenberg itself. Thankfully, this is just another example of the developer community coming in to fill the gap.
The post An Easy Way to Edit Block Visibility in the WordPress Gutenberg Editor appeared first on Speckyboy Design Magazine.