
- Free Templates for Your Google Slides Presentation
- How to Turn Google Slides into Video
- How to Do Voiceover on Google Slides
- How to Play a Video on Google Slides
- How to Upload Google Slides to YouTube
- Custom Templates for Your Google Slides Presentation: A Short Overview
- Final Word
When it comes to building a presentation, many of us are going to use PowerPoint or Keynote software that have been popular all over the world for quite some time. And this is not surprising — these two applications combine all the capabilities of the visual platform and spacious area for text which allows communicating the business idea in the clearest way. This is why they are both first on the list of commonly used business tools intended to make your life easier.

In the meantime, competitors are ready to offer better and cheaper ways to communicate business ideas to the audience. This is where Google Slides enters the game. It belongs to a group of new presentation software which is rapidly gaining popularity. And even though it operates similarly to PowerPoint, Google Slides still has the features that make it stand out among the competition.
Not only is it a powerful tool itself, but it also allows for collaboration and seamless sharing. Multiple users can work on the presentation simultaneously, no matter if they are in the same room or in different parts of the world. Overall, this is a great option for business owners who want to manage their teams more effectively and get the work done faster.
Free Presentations Templates
If that sounds appealing to you, it’s high time to try some free Google Slides templates for your next presentation. To make the process of building pitches even more convenient, consider this comprehensive guide and find out how to get more out of Google Slides.


How to Turn Google Slides into Video
Turning Google Slides into video brings you a lot of benefits. Not only can you share the slideshow with the audience after the actual meeting, but you also have an opportunity to share a Google video presentation along with the other social media resources, such as YouTube, Vimeo, etc. By doing so, you can reach a wider audience and get additional sources for advertising your business.
In this specific guide, we will show you how to save a Google Slides presentation as a video file. Unlike PowerPoint software, Google Slides offers no options to save the pitch as a video. So, the developers have decided to fill the gap and created certain add-ons that would make the export process a piece of cake. You choose what extensions to use. There are many of them comprising Screencast-O-Matic, Creator Studio, Screencastify, and others.
In this tutorial, we will use a free extension for Google Chrome — Screencastify. So, let’s get started.
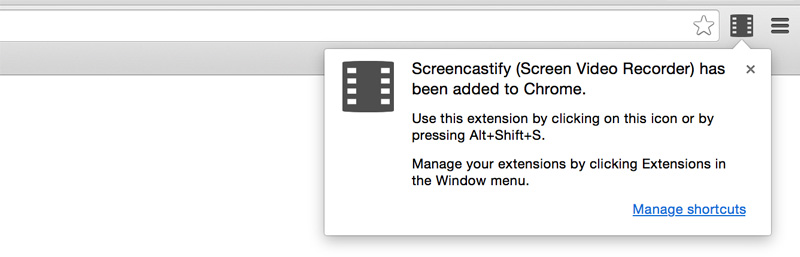
1. Install Screencastify
Navigate to Chrome Web Store to install the mentioned add-on from there.

Once done with the installation, you will see a distinctive icon in the upper right corner of the browser. Click on the icon or press Alt+Shift+S.
Apart from that, you will have to allow camera access in Chrome and choose if you want to get the recording stored in Google Drive or locally on a specific device.

2. Proceed with recording Google Slides pitch
Open your Google Slides pitch in the Chrome browser and present it by clicking the corresponding button. After that, hover on the Screencastify icon and press it to have the popup appear.

In the drop-down menu, you will find three options: Tab, Desktop, and Cam which will let you choose to record the chosen tab in Chrome, the whole desktop, or the webcam correspondingly. If you want to save audio to the recording, leave all settings as they are. In cases where the audio is unnecessary, just reset the Microphone and Audio tab.
Press the “Start Recording” button as soon as you are ready to start. During the recording, make sure to present the slides.
3. Save the recording
When you are finished, navigate to the extension and choose to stop recording. Upon saving, you will see the end file where you can insert the title and check on the recording data.
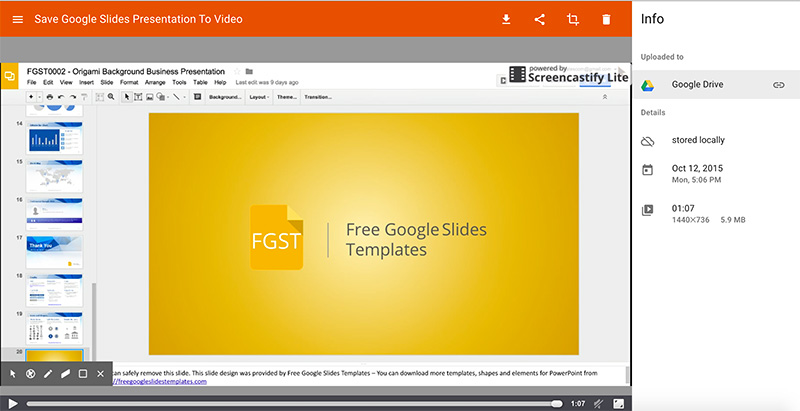
At this stage, you have an opportunity to save your Google video presentation to Google Drive and share it directly through the link online or by embedding it on any social media services like YouTube, Vimeo, and others.
How to Do Voiceover on Google Slides
Audio has a way of spicing up any presentation. Although, if you’ve just moved on from PowerPoint or Keynote software to Google Slides, there is one thing you should know about it — it doesn’t support audio. But even so, you still have an opportunity to add video files inside separate slides. Long story short, all you have to do is embed the video to the slide, hide it, and enable the autoplay mode. Let’s consider the process in detail.
1. Get the audio file prepared
Start with converting audio files to video. For that, you can leverage different tools for conversion, such as FFmpeg or Audacity. When you are done with the conversion, upload the video to Google Drive.
2. Embed Google Slides voice over
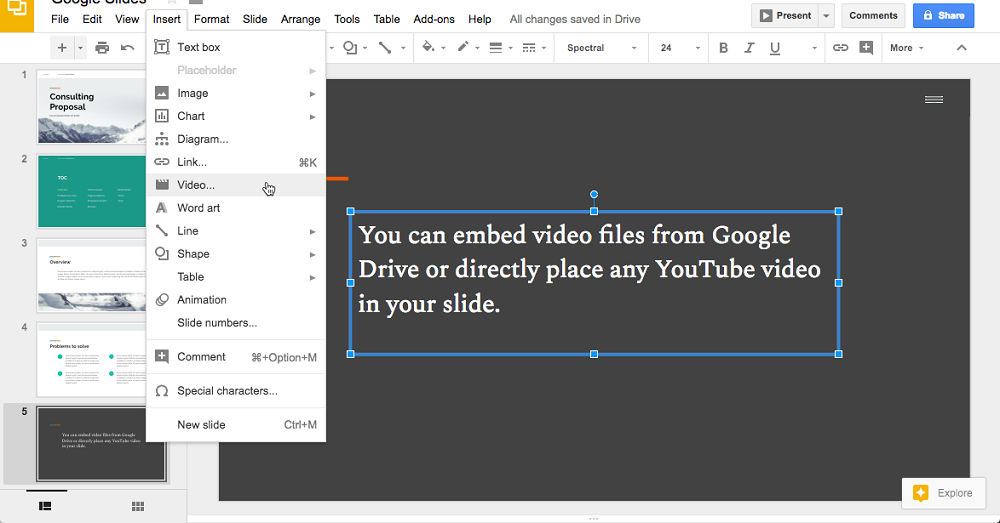
Continue with opening a Google Slides presentation. Find the “Insert” option on the panel and choose Video from the drop-down menu. Select the file from Google Drive storage or insert the link from any YouTube video by switching over to the “By URL” tab.
3. Enable Autoplay mode
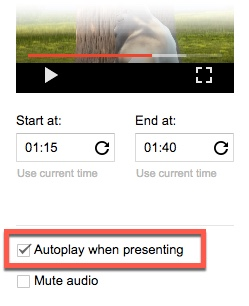
Upon embedding video files to one of the slides, right-click it and select Video options.

Find the “auto-play when presenting” option in the settings and play around with the start and end time of the video if you’ve decided to use timed voice over.
4. Make the video player invisible
To make the audio play in the background, consider hiding the video file from the slide. Either resize the video play to make it too small to be noticed or take it out of the slide completely, so it won’t be visible during the slideshow (see below).
How to Play a Video on Google Slides
Adding videos to your Google Slides presentation can bring it to life and keep the audience engaged during the entire slideshow. Including YouTube (or non-YouTube) videos in your pitch doesn’t take much time and effort. Here’s a quick solution for adding any kind of video to Google Slides.
Non-YouTube videos:
- Before embedding video to your Google Slides presentation, make sure you have it available in your Google Drive storage. If you’ve not uploaded it yet, go to Google Drive, click on the “New” button, and upload the file.
- Open your presentation, choose the “Insert” option on the panel, and press the “Video” button.
- Choose the Google Drive tab on the top of the new window and find the video you want to add. Double-click on the file to make it appear on the slide.
YouTube videos:
- Open Google Slides and go to the slide you want to insert the YouTube video to.
- Choose “Video” from the “Insert” option.
- Find the required video through search or by URL if you know what video you want to play in the presentation. Press “Select” to add it to the chosen slide.
You can leave it as is, but be aware that you will have to manually play the video during the whole pitch. If this is not an issue for you, jump to the next paragraph. But if you want to be the best presenter, we have a few short tips for you. Consider them to make playing videos a smooth and easy process.
1. Set the start and end time
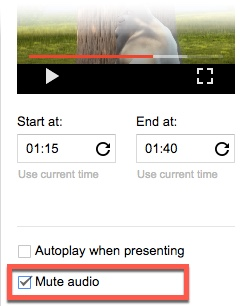
When you are finished with embedding the video to Google Slides, right-click on it and go down to Video options. In the pop-up window, set the start and end time for a specific part of the video.

2. Enable Autoplay
Here in the popup window, you can also choose the “Autoplay when presenting” option if you don’t want to play the video manually. With the autoplay feature, the video will start with the slide displayed. It makes the presentation seamless and lets you totally focus on your physical presentation and commentary on it.
3. Mute audio
If you are not attracted to the idea of shouting over the sound on the video, this option will be of service. Just tick Mute audio checkbox, same as for “Autoplay when presenting.”
In addition to the advanced settings for video play, remember that using short videos will significantly improve the presentation and make it easy to grasp.
How to Upload Google Slides to YouTube
Now that you know how to convert Google Slides into video, uploading it to YouTube will be an easy step. So, let’s quickly go over the key points and move to the step-by-step guide that will show you how to add your video to YouTube.
- Create a presentation.
- Add speaker notes to each slide to let the viewers get a full picture of the pitch.
- Use one of the add-ons between Screencast-O-Matic, Creator Studio, Screencastify, or others you like to turn your Google Slides presentation into a video.
- Download the video to your computer.
Before uploading your video to YouTube, double-check on the formats supported by the video-sharing website. Once done, have a look at the quick guide.
- Register on YouTube or log in if you already have an account.
- Find the upload button on the upper right corner and click to upload the video.
- Select a file to upload or drag it into the window.

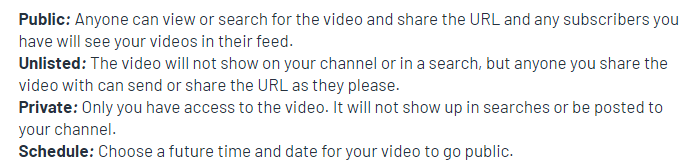
- Choose the privacy option–either public, unlisted, private, or schedule depending on who is authorized to see the Google video presentation.
- Add information to the video including an SEO-friendly title and description, tags to let users find your video, and thumbnails.
- When you are done with all the necessary settings, it’s time to save your changes and publish the video.
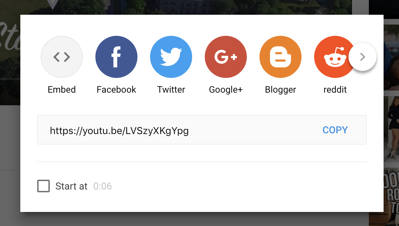
Now that you’ve successfully uploaded your Google video presentation to YouTube, you can share it with your colleagues, business partners, investors, and many others by copying the link and sending it to them.
Custom Templates for Your Google Slides Presentation: A Short Overview
This is a bonus paragraph for those of you who have become bored with the default template and are looking for a custom design to use on your next presentation. Created by professional, high-skilled developers, these Google Slides templates offer a solid collection of tools and elements to save you all the hassle of building a pitch from scratch.
So, let’s have a look at the next five recently added templates that will breathe life into your presentation.
Doora Google Slides

This minimalist Google Slides template is a great solution for creative and unique presentations. Because it has a flexible design, the template will suit most business, corporate, or even personal needs. Inside the package, you will find a variety of tools and elements needed for building a converting pitch. Some of them include:
- 30 unique slides
- 5 color schemes
- Master Slide and picture placeholder on board
- Infographic set
- Portfolio slides and device mockups, etc.
Contrax Google Slides
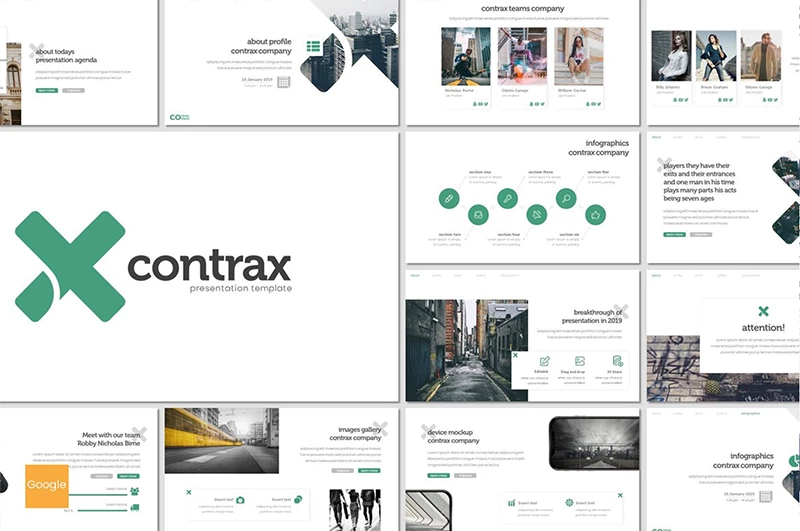
Contrax is another minimalist template specifically created for your best, engaging presentations made in Google Slides. It is well-structured and excludes any distracting elements which encourage focusing on the most important information in the pitch. In the meantime, the tools included in the template will be enough to build an eye-catching and fully informative slide show. Consider these below:
- Picture placeholder on board
- 30 modern, unique slides
- 5 color schemes
- Images gallery and device mockup slides
- Infographics
Business Rapture Google Slides

Consider this creative template with a professional design if you are looking for a ready-made solution for your business presentation. This is a great option for annual reports, business plan presentations, student projects, and even personal needs. Everyone who wants to communicate their ideas to the audience creatively will find this template a real “treasure.” It comes with a whole set of elements, some of which include:
- 50 unique slides
- Slide transitions
- Photoshop is not needed for customization
- Full HD
- Infographics
Smart Report Google Slides

For those of you who want to impress the audience with a vivid and interactive presentation, the Smart Report template will come in handy. Creative and professional-looking slides, as well as numerous tools and elements needed for building a high-class pitch are all at your disposal. Also, the template is fully editable, so Photoshop is not needed to customize the slides. Using the following elements, you can do it at the push of a button.
- 30 unique slides with a professional design
- High resolution
- Full and friendly support
- Infographics
- Report slides and more
Business Plaza Google Slides

Whether you plan to present a business plan to your colleagues, business partners, or investors or you have a student project at the university, this Google Slides template will be a great solution in most cases. Equipped with a vast number of elements and tools, this template will save you the hassle of building a presentation from scratch. Consider what you’ll get with Business Plaza further:
- 100 unique, high-resolution slides
- Friendly support
- Infographics
- About Us slides
- No need to use Photoshop for editing
Final Word
Now that you know how to add a video to your Google Slides presentation, set advanced play settings, convert the pitch into video, and then add it to YouTube, you can spice it up, boost the audience’s interest, and share the presentation with the whole world. We hope that this guide has inspired you to start using Google Slides for your business and personal needs and create an engaging and converting pitch at your earliest convenience. To let other people get inspired as well, don’t forget to share this paper with your friends and colleagues.
Read Also
- Google Slides: The Ultimate Guide
- How to Use Google Slides to Create a Stunning Business Presentation
- Google Slide Tutorial: How to Craft a Splendid Presentation
- Google Slides Tutorial — From an Absolute Beginner to an Expert
An Ultimate Guide on How to Turn Google Slides into Video FAQ
Turning Google Slides into video brings you a lot of benefits. Not only can you share the slideshow with the audience after the actual meeting, but you also have an opportunity to share a Google video presentation along with the other social media resources, such as YouTube, Vimeo, etc. By doing so, you can reach a wider audience and get additional sources for advertising your business.
So, let’s get started:
– install Screencastify;
– proceed with recording Google Slides pitch;
– save the recording.
Mode details you’ll find in the article!
Audio has a way of spicing up any presentation. Although, if you’ve just moved on from PowerPoint or Keynote software to Google Slides, there is one thing you should know about it — it doesn’t support audio. But even so, you still have an opportunity to add video files inside separate slides. Long story short, all you have to do is embed the video to the slide, hide it, and enable the autoplay mode.
Let’s consider the process:
– get the audio file prepared;
– embed Google Slides voice over;
– enable Autoplay mode;
– make the video player invisible.
If you want to be the best presenter, we have a few short tips for you. Consider them to make playing videos a smooth and easy process:
– set the start and end time;
– enable Autoplay;
– mute audio.
Now that you know how to convert Google Slides into video, uploading it to YouTube will be an easy step. So, let’s quickly go over the key points and move to the step-by-step guide that will show you how to add your video to YouTube.
– Create a presentation.
– Add speaker notes to each slide to let the viewers get a full picture of the pitch.
– Use one of the add-ons between Screencast-O-Matic, Creator Studio, Screencastify, or others you like to turn your Google Slides presentation into a video.
– Download the video to your computer.
Before uploading your video to YouTube, double-check on the formats supported by the video-sharing website. Once done, have a look at the quick guide.
– Register on YouTube or log in if you already have an account.
– Find the upload button on the upper right corner and click to upload the video.
– Select a file to upload or drag it into the window.
– Choose the privacy option–either public, unlisted, private, or schedule depending on who is authorized to see the Google video presentation.
– Add information to the video including an SEO-friendly title and description, tags to let users find your video, and thumbnails.
– When you are done with all the necessary settings, it’s time to save your changes and publish the video.
The post An Ultimate Guide on How to Turn Google Slides Into a Video appeared first on MonsterPost.