
A border in PowerPoint is a visible line or frame surrounding an image or text box, enhancing its visual appeal and drawing attention to the content. Borders help define boundaries, separate elements on a slide, and provide a polished, professional appearance.
They can be customized in terms of color, thickness, and style to match the presentation’s theme or emphasize specific elements. By using borders, you can improve the overall design, create emphasis, and increase the readability of your slides, making your presentation more engaging and effective.
In this article, we’ll guide you through the process of adding borders to various elements in PowerPoint, helping you create engaging and professional-looking presentations.
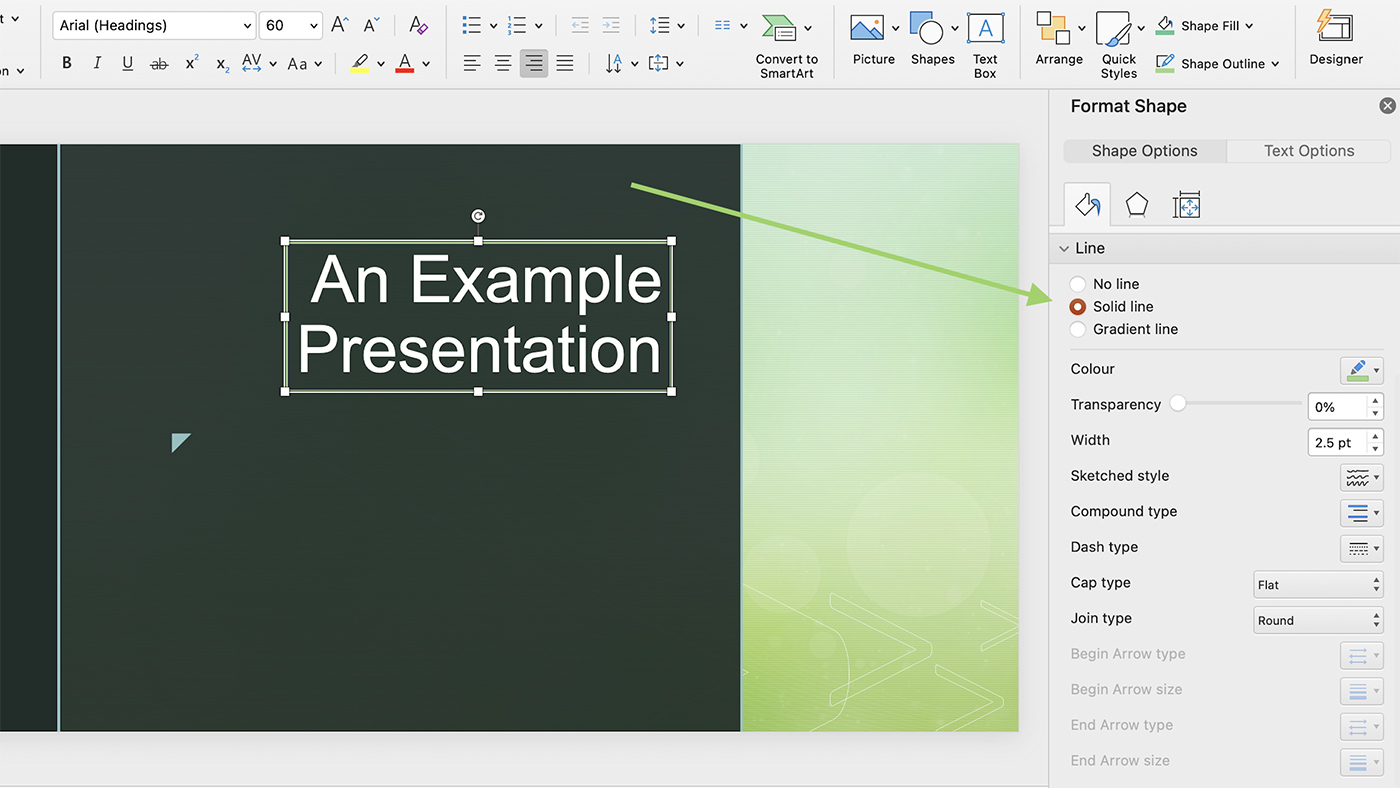
Adding a Border to a Text Box or Shape
PowerPoint allows you to add borders to text boxes and shapes with just a few clicks. Follow these steps to add a border:
- Select the text box or shape you want to add a border to by clicking on it.
- Click the “Shape Format” tab in the PowerPoint toolbar.
- In the “Shape Styles” group, click on the “Shape Outline” button.
- Choose a color for the border from the drop-down menu. You can select from the theme colors, standard colors, or create a custom color using the “More Outline Colors” option.
- If you want to adjust the width of the border, click on the “Weight” option in the “Shape Outline” drop-down menu and choose a line width.
- If you prefer a dashed or dotted line border, click on the “Dashes” option in the “Shape Outline” drop-down menu and choose a line style.
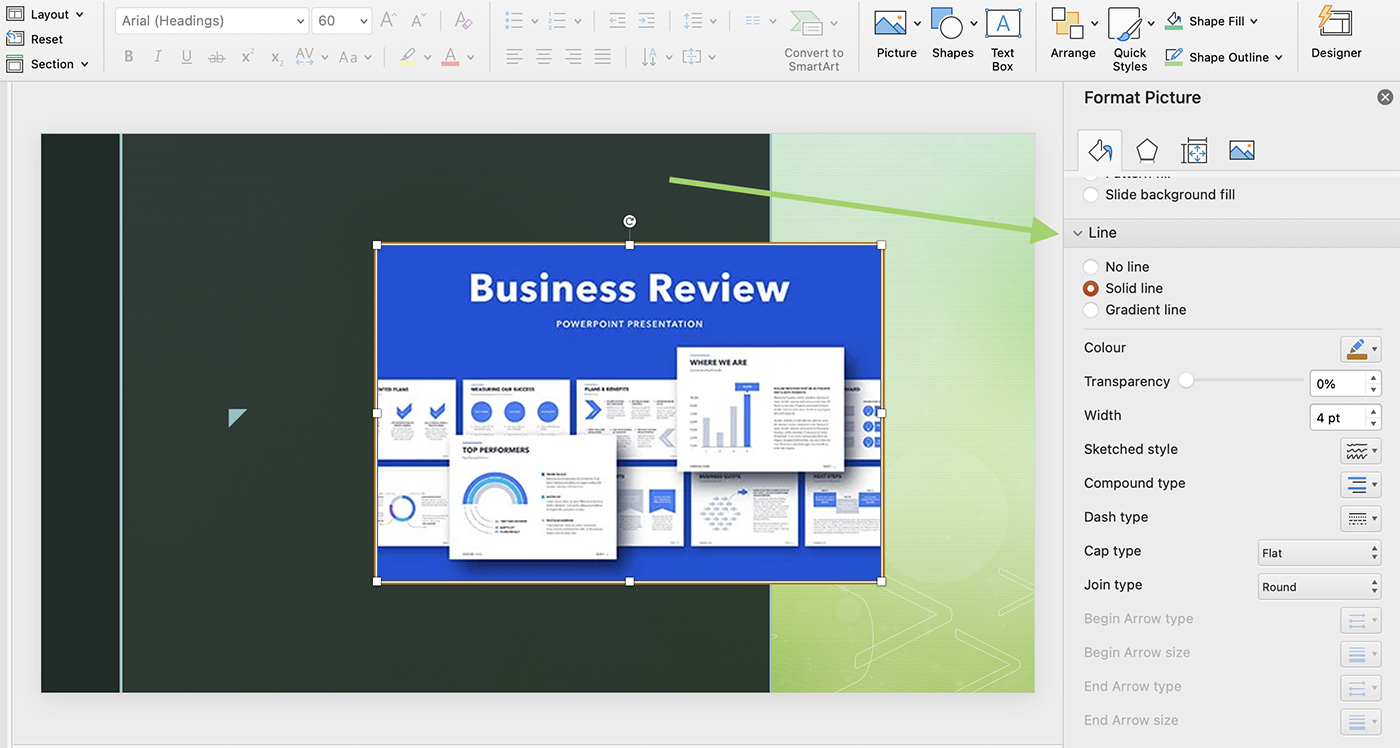
Adding a Border to an Image
To add a border to an image in PowerPoint, follow these steps:
- Select the image you want to add a border to by clicking on it.
- Click the “Picture Format” tab in the PowerPoint toolbar.
- In the “Picture Styles” group, click on the “Picture Border” button.
- Choose a color for the border from the drop-down menu. You can select from the theme colors, standard colors, or create a custom color using the “More Outline Colors” option.
- If you want to adjust the width of the border, click on the “Weight” option in the “Picture Border” drop-down menu and choose a line width.
- If you prefer a dashed or dotted line border, click on the “Dashes” option in the “Picture Border” drop-down menu and choose a line style.
Adding a Border to the Entire Slide
To add a border to the entire slide, you can use a rectangle shape as a frame. Follow these steps:
- Click the “Insert” tab in the PowerPoint toolbar.
- In the “Illustrations” group, click on the “Shapes” button and select the rectangle shape.
- Draw a rectangle on the slide by clicking and dragging. Adjust the size so that it covers the slide’s edges, creating a border effect.
- Click the “Shape Format” tab in the PowerPoint toolbar.
- Follow the steps outlined in the “Adding a Border to a Text Box or Shape” section to customize the border color, width, and style.
- To remove the fill color, click on the “Shape Fill” button in the “Shape Styles” group and select “No Fill.”
Advanced Border Options
For more advanced border options or to create a unique design, you can combine multiple shapes or use PowerPoint’s “Merge Shapes” feature. This allows you to create custom borders and frame designs that suit your presentation’s theme.
- Insert multiple shapes on your slide using the “Insert” tab and the “Shapes” button.
- Arrange and resize the shapes as needed to create a border or frame design.
- Select all the shapes by holding down the “Shift” key while clicking on each shape.
- Click the “Shape Format” tab in the PowerPoint toolbar.
- In the “Insert Shapes” group, click on the “Merge Shapes” button and choose a merge option, such as “Union” or “Combine,” to merge the shapes into a single border design.
- Customize the border color, width, and style following the steps outlined in the “Adding a Border to a Text Box or Shape” section.
Tips for Creating Effective Borders
When adding borders to your PowerPoint slides, keep the following tips in mind to ensure your presentation remains visually appealing and professional:
- Keep it simple: Too many decorative elements can be distracting. Stick to simple, clean borders to maintain a polished look.
- Be consistent: Use the same border style, width, and color throughout your presentation for a cohesive appearance.
- Match your theme: Choose border colors and styles that complement your presentation’s theme and color scheme.
- Use contrasting colors: Choose a border color that contrasts with the background to ensure it stands out and frames the content effectively.
Conclusion
Incorporating borders into your PowerPoint presentation can enhance its overall look and help emphasize key points or elements. By following the steps and tips provided in this article, you can easily add and customize borders for various elements, such as text boxes, shapes, images, and entire slides. With a little practice and creativity, you can use borders to create visually engaging and professional presentations.