In the realm of presentations, PowerPoint has always reigned supreme. Its versatility and ease of use make it the go-to choice for professionals and students alike.
But as we navigate this digital-centric age, the ability to embed clickable links directly into PowerPoint slides can transform a static presentation into an interactive masterpiece. Whether it’s to reference a website, jump to a specific slide, or even initiate an email, hyperlinks can add depth to your content.
Let’s dive deep into the process of adding hyperlinks in PowerPoint and explore some crucial best practices.
Step 1: Selecting Your Text or Object
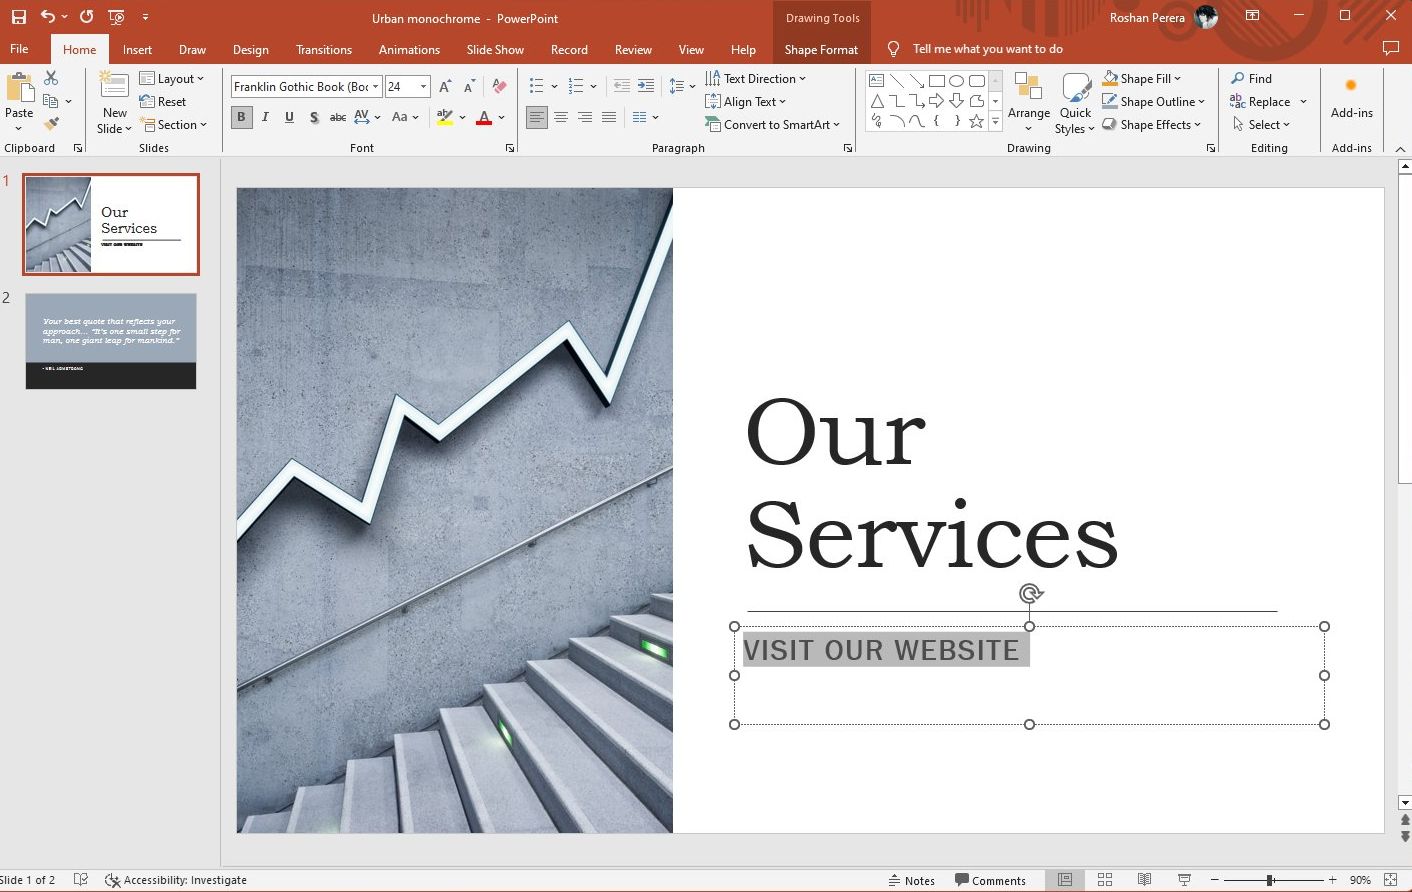
Decide on the text, image, shape, or even chart that you want to turn into a clickable hyperlink. Highlight the text or click once on the object, ensuring it’s selected. A bounding box or highlighted area should appear, indicating your selection.
Once selected, right-click to open a context-sensitive menu. This menu provides various options based on what you’ve selected.
Step 2: Navigating the ‘Hyperlink’ Option
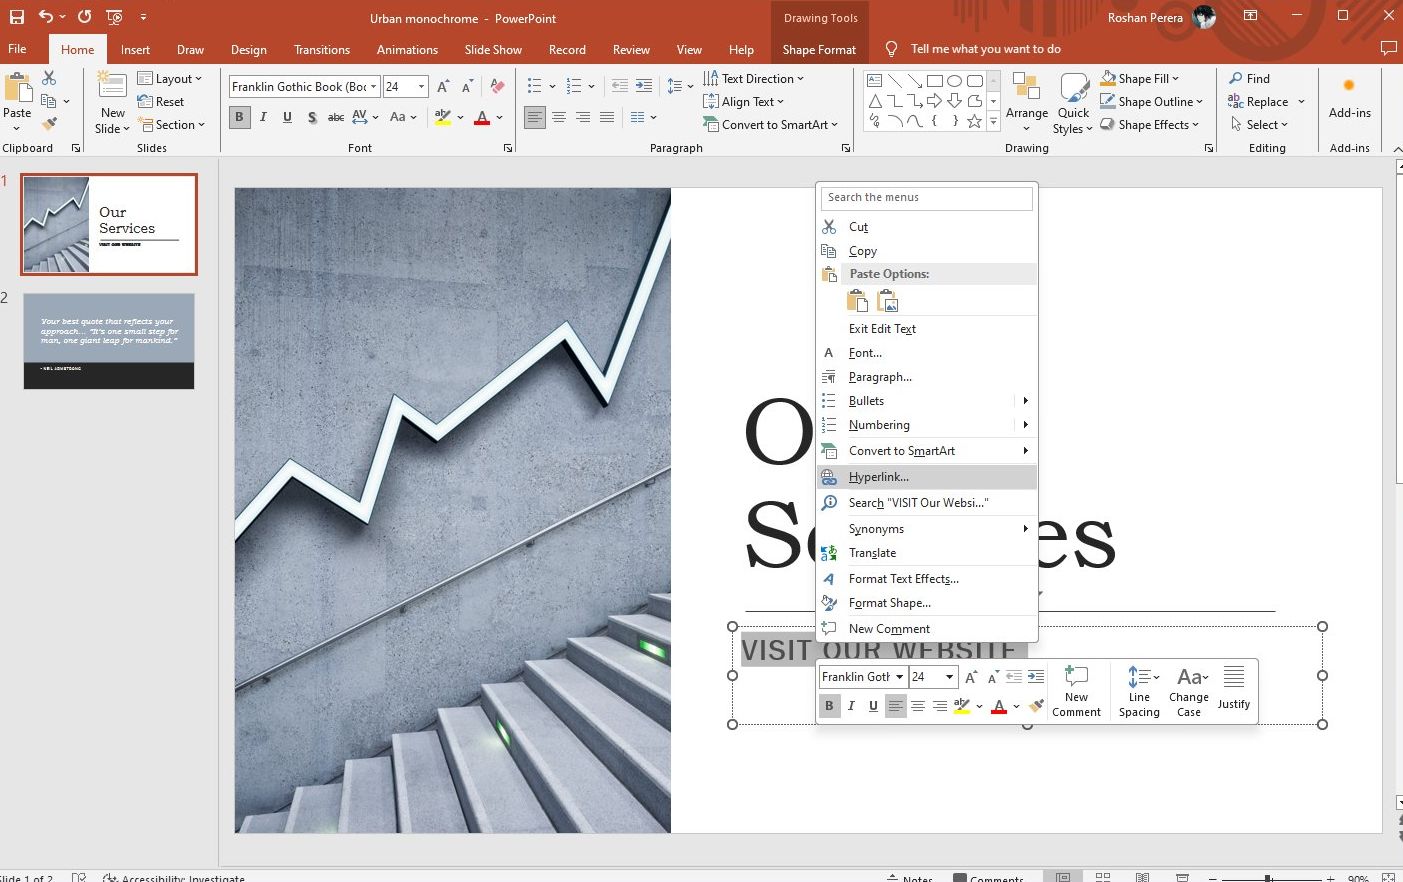
In the right-click menu, locate and select the ‘Hyperlink’ option. The ‘Insert Hyperlink’ dialog box will pop up, presenting several hyperlinking opportunities.
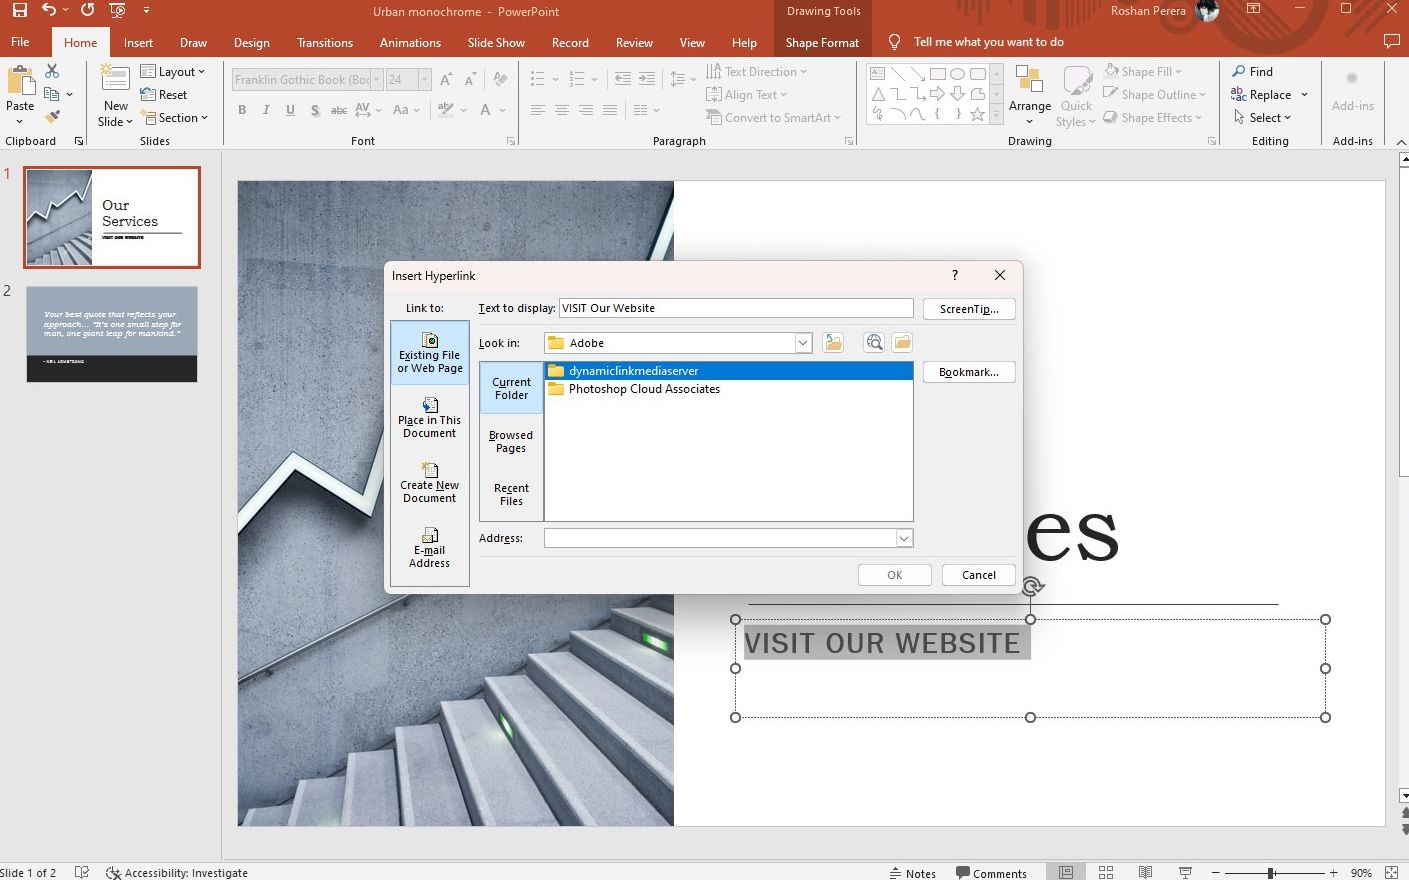
Understanding Link Types:
- Existing File or Web Page: This is perhaps the most commonly used option. Here, you can link to a webpage, a file on your computer, or even a file on a network.
- Place in This Document: A great feature for creating non-linear presentations, this option lets you jump to specific slides within your deck.
- Create New Document: Want your hyperlink to create and open a new document? This option is for you, though it’s less commonly used in presentations.
- Email Address: Initiating an email is as simple as inputting an address here. Once clicked during a presentation, it will open the viewer’s default email client with the chosen address pre-populated.
Step 3: Entering Your Desired Link
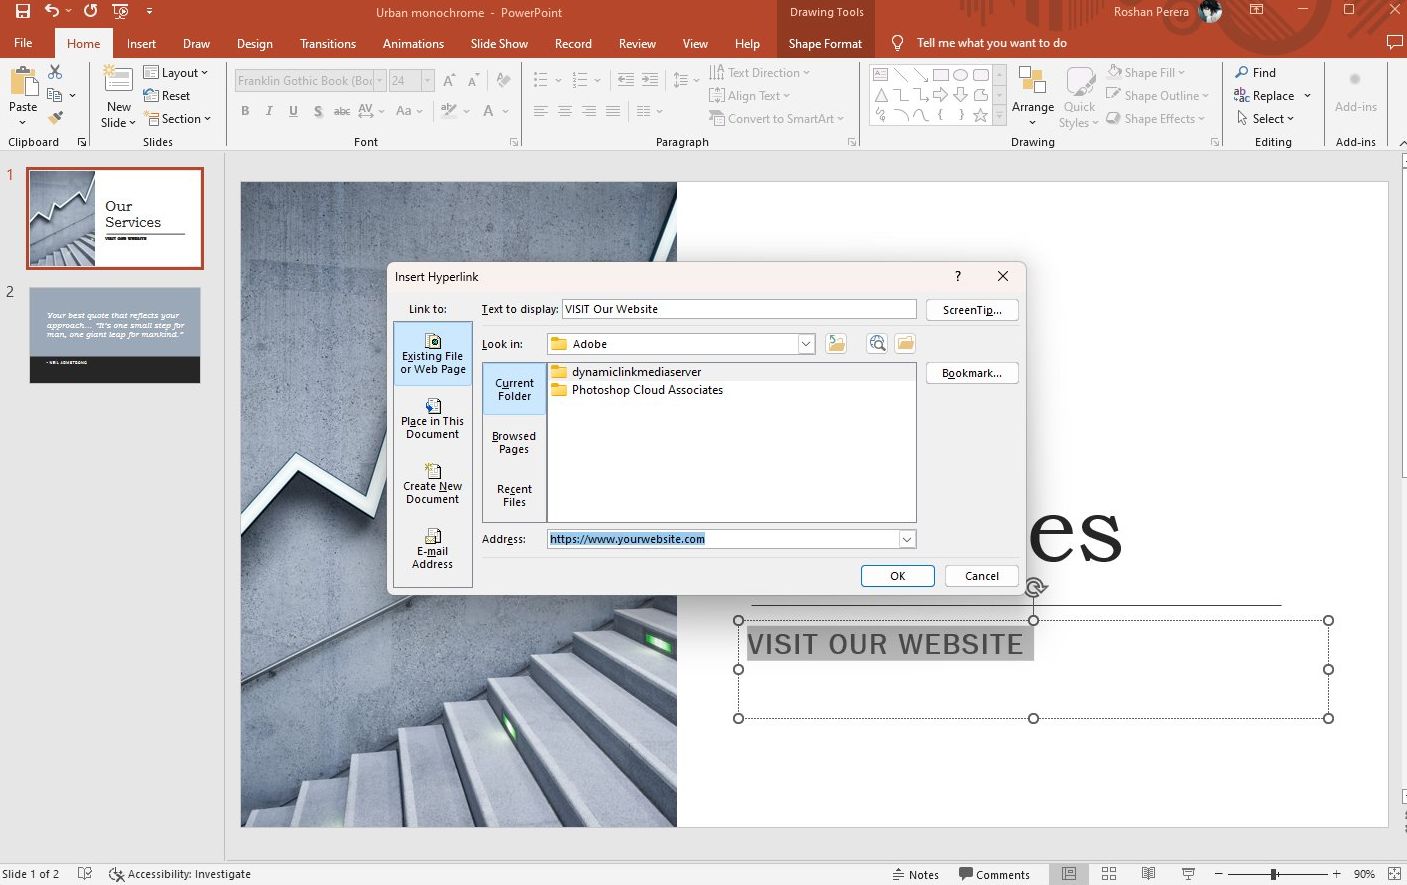
Linking to a Website: Under ‘Existing File or Web Page’, input the URL of the website you wish to link to.
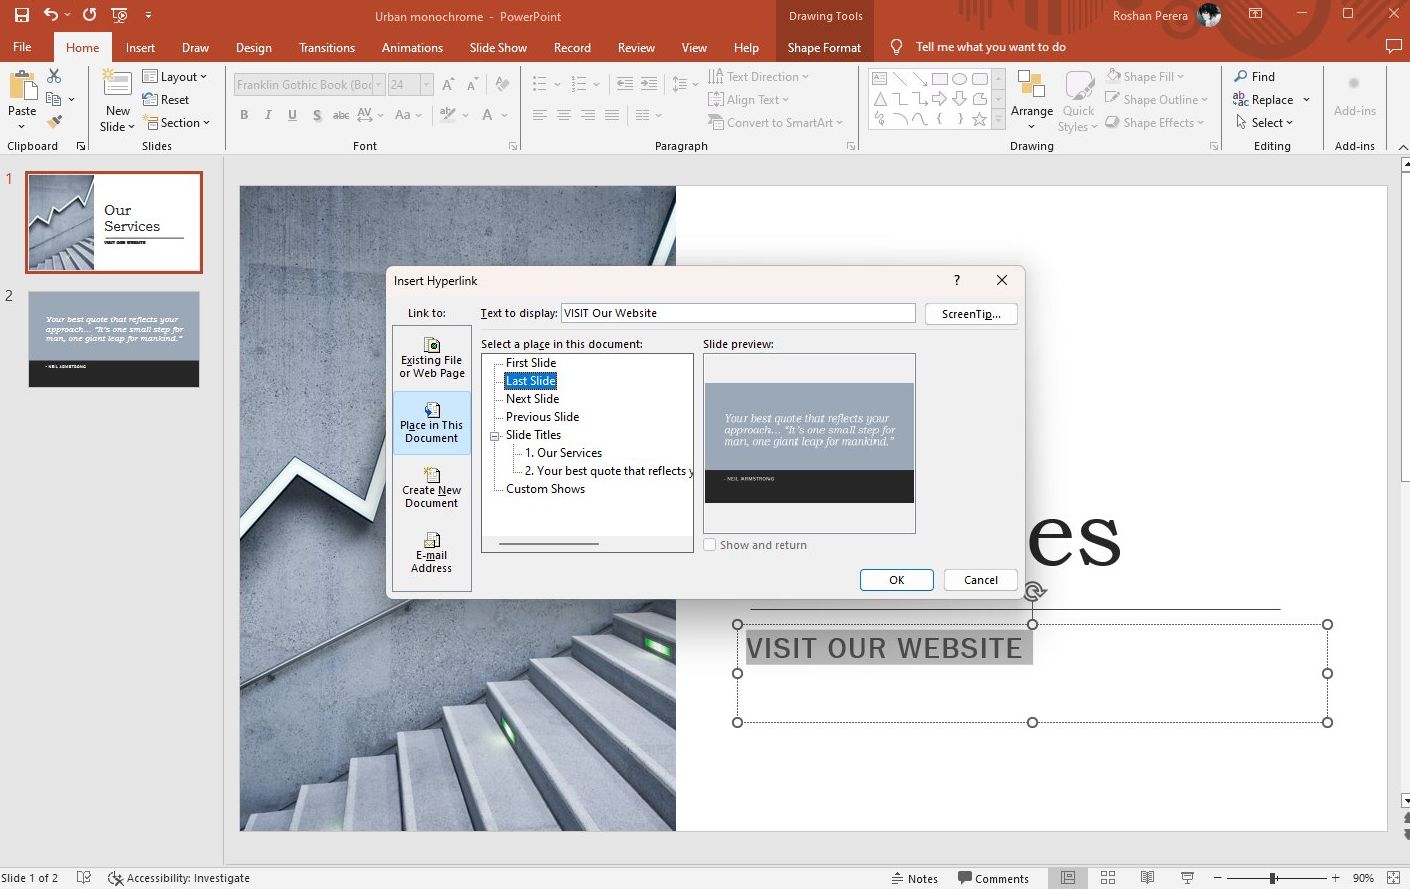
Jumping Between Slides: Under ‘Place in This Document’, a list of all your slides will appear. Simply select the desired destination slide.
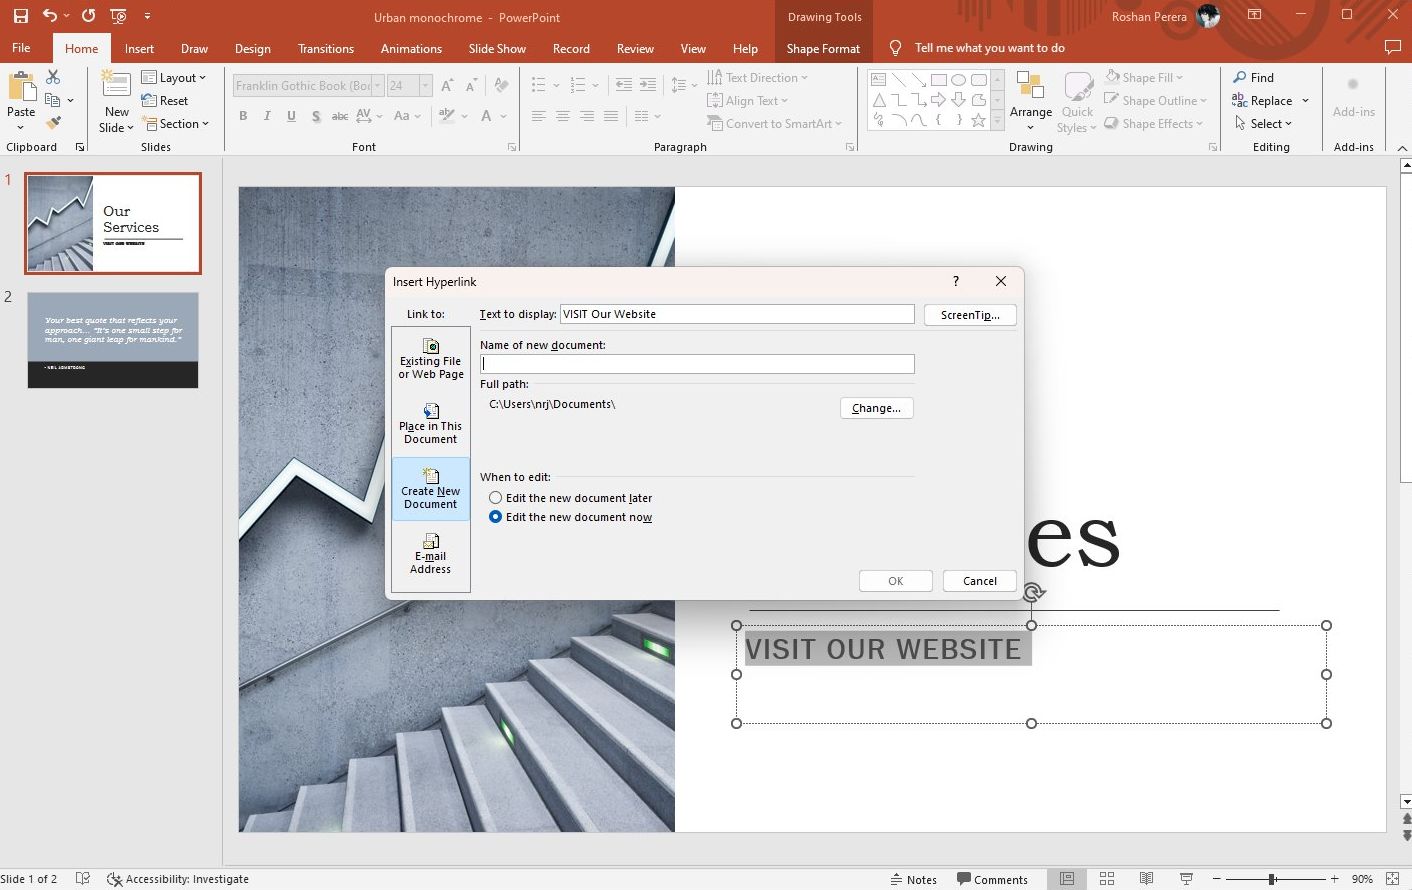
For New Documents: If you chose ‘Create New Document’, you’d have to name the document and decide whether it should be edited now or later.
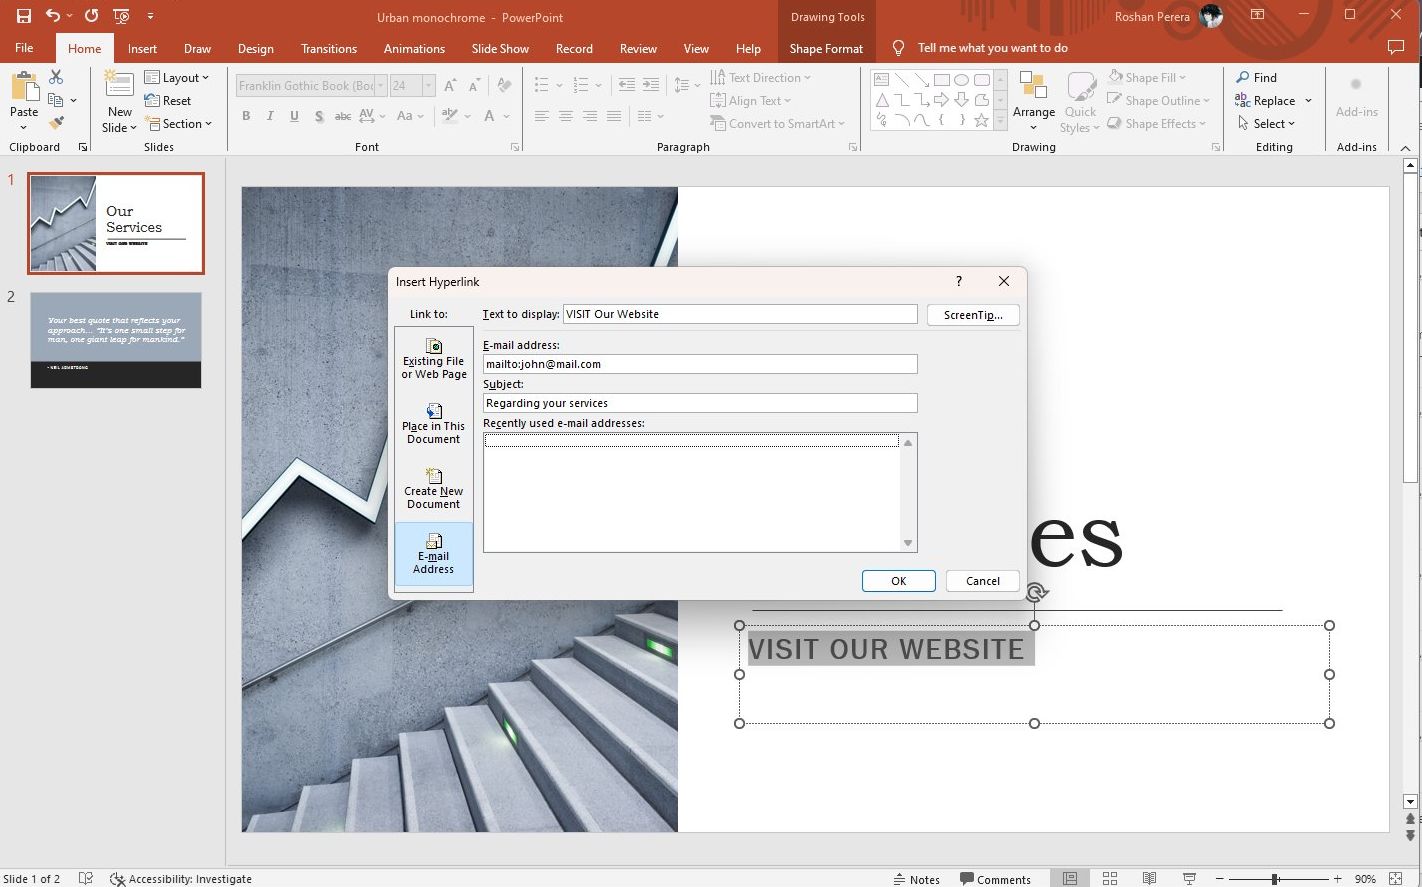
Email Links: Under ‘Email Address’, input the email and subject. The subject is optional but can pre-populate the email’s subject line for the viewer.After inputting your link, click ‘OK’. Your selected text or object will now bear the hallmark of a hyperlink, typically underscored and in a contrasting color.
7 Tips and Best Practices for Using Links in PowerPoint
1. Visibility is Key
Ensure your hyperlink stands out. Differentiate it with a unique color or underline. But remember, it should still fit aesthetically with your slide’s design.
2. Always Test
Just added a link? Test it! Before presenting, ensure every link directs to the correct location or performs the intended action.
3. Maintain Balance
Hyperlinks can make slides interactive, but don’t overdo it. An overload of links can turn a presentation chaotic and confusing.
4. Descriptive Link Text
Rather than “Click Here”, use text like “Read More About Our Research”. It’s informative and aids in comprehension.
5. Shortcut Know-How
When navigating a presentation, remember that holding the Ctrl key and clicking will activate a hyperlink. This knowledge can come in handy for presenters.
6. Consider Your Audience
Remember, not all viewers may be familiar with hyperlinks in presentations. Provide subtle guidance, either verbally or with on-screen cues.
7. Keep Accessibility in Mind
For those using screen readers, hyperlink text should be descriptive. Avoid raw URLs as the link text and opt for a brief, concise description.
Conclusion
By embedding hyperlinks thoughtfully, you can enrich your PowerPoint presentations, offering an interactive experience and delivering additional value. With this detailed guide and the accompanying best practices, you’re well on your way to mastering the art of hyperlinking in PowerPoint.
