
Curving text in InDesign is a fundamental skill for creating eye-catching designs and layouts. Whether you’re creating a logo, printed project, or a digital graphic, it’s a key skill to know.
In this article, we’ll walk you through the process of curving text along a path or around a shape using InDesign. You’ll learn the basics of creating curved text and modifying it to fit your design needs.
We’ll also share five helpful tips for how to make curved text look and feel natural and effective.
Create a Path or Shape
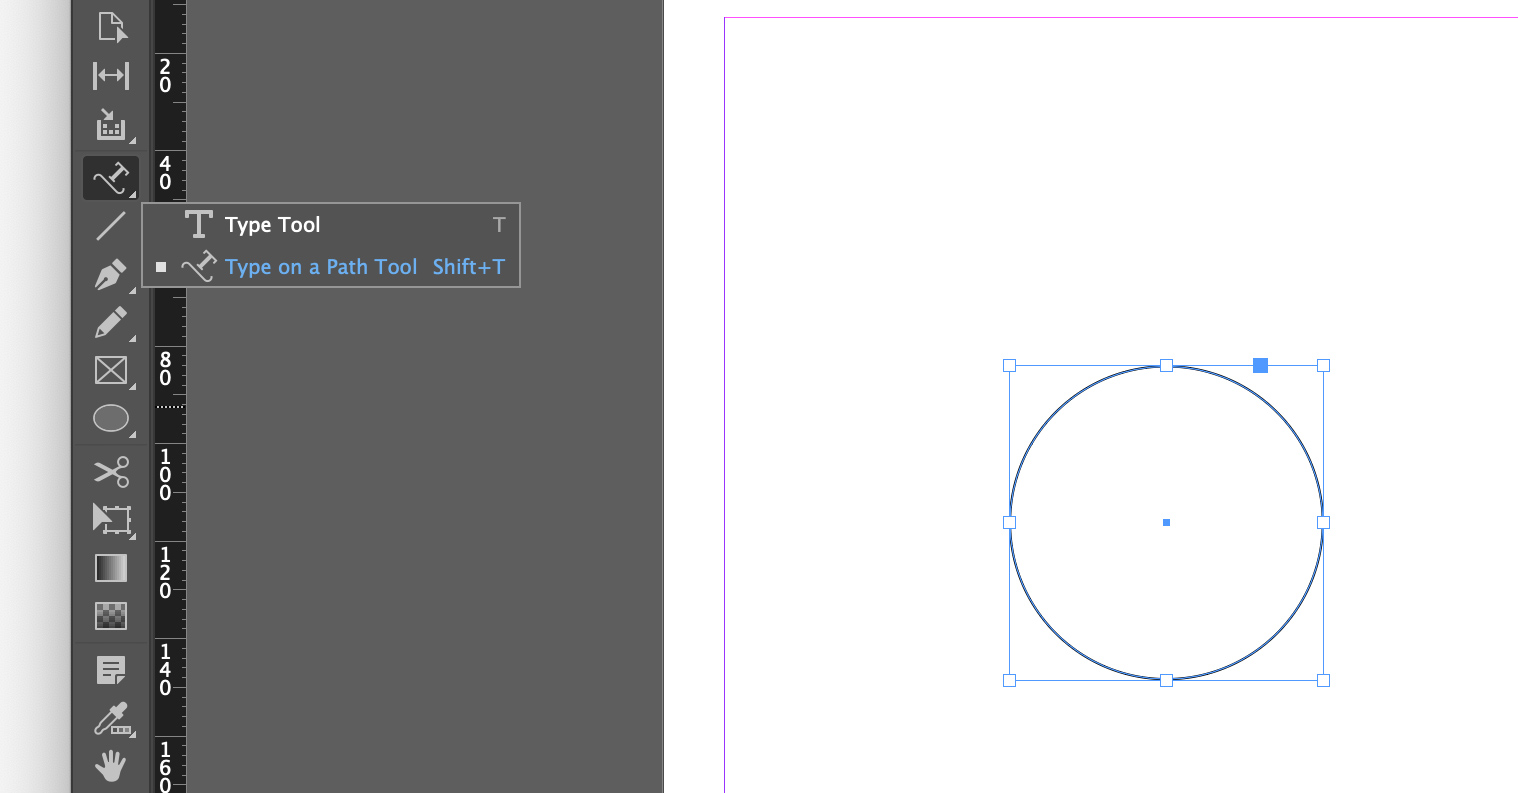
First, you’ll need a path or shape to which your text will conform. You can use the Pen Tool, Ellipse Tool, or any other drawing tool to create a custom path or shape. Here are the steps to create a simple circle shape:
- Select the “Ellipse Tool” (L) from the “Tools” panel.
- Click and drag on the canvas while holding down the “Shift” key to create a perfect circle.
You can also use the “Pen Tool” (P) to draw a custom path if you prefer a more unique shape for your curved text.
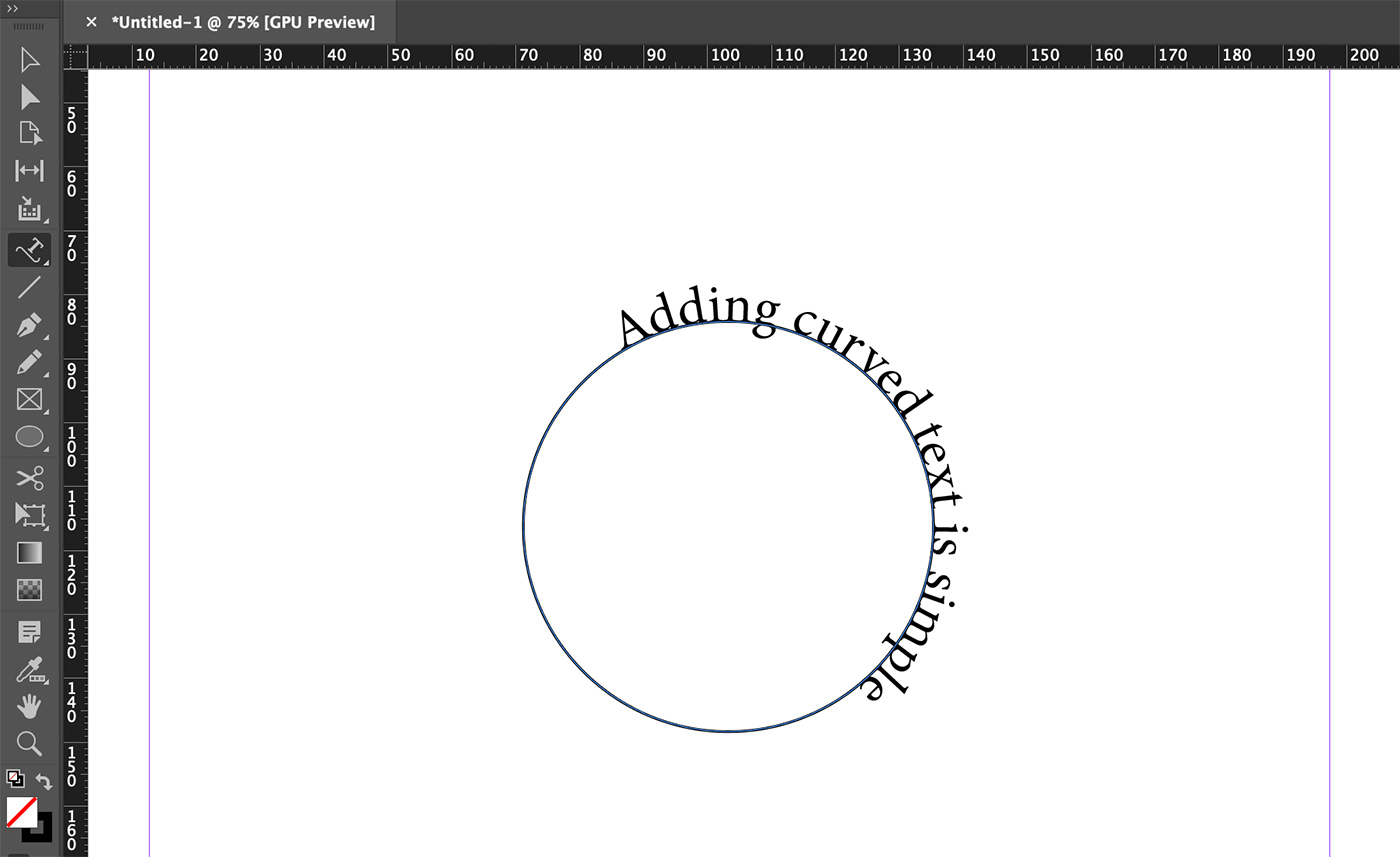
Add Text to the Path or Shape
Now that you have your path or shape, it’s time to add text to it:
- Select the “Type on a Path Tool” from the “Tools” panel. You can find it by clicking and holding on the “Type Tool” (T) and choosing it from the dropdown menu.
- Click on the path or shape where you want to start adding text. This will convert the path into a text container.
- Type your text, and it will automatically conform to the shape of the path.
Adjust the Text Position and Formatting
You can adjust the position and formatting of your curved text to achieve the desired effect:
- To move the text along the path, use the “Selection Tool” (V) to click and drag the small bracket-like handles that appear on the path.
- To change the text size, font, and other formatting options, select the text with the “Type Tool” (T) and use the “Character” and “Paragraph” panels to apply the desired settings.
- To adjust the spacing between characters (kerning) or lines (leading), use the “Character” panel or the “Type” menu > “Kerning” or “Leading” options.
Detach the Text from the Path or Shape
If you want to separate the text from the path or shape, follow these steps:
- Select the text container with the “Selection Tool” (V).
- Go to the “Type” menu > “Type on a Path” > “Options.”
- In the “Type on a Path Options” dialog box, uncheck “Align to Path” and click “OK.”
This will detach the text from the path, and you can move, resize, or rotate it independently.
5 Tips for Working With Curved Text
Tip 1: Adjust the Spacing Between Characters
When working with curved text in InDesign, you may need to adjust the spacing between characters (kerning) for better readability. To do this, click between the characters you want to adjust, hold the “Alt” key (Windows) or “Option” key (Mac), and use the arrow keys to increase or decrease the spacing. Proper kerning ensures that your curved text looks polished and professional.
Tip 2: Modify the Baseline Shift
For fine-tuning the vertical alignment of your curved text, you can adjust the baseline shift. Select the text or individual characters that need adjustment, then open the “Character” panel.
Here, you can modify the “Baseline Shift” value to reposition the text or characters vertically, aligning them with the curve path more accurately.
Tip 3: Control the Text Orientation
Depending on your design, you might want the curved text to be oriented differently along the path. To control the text orientation, select the text with the “Type on a Path” tool, and open the “Type on a Path Options” dialog box by going to “Type > Type on a Path > Options.”
Choose between different effect options such as “Rainbow,” “Skew,” “3D Ribbon,” or “Stair Step” to achieve the desired text orientation.
Tip 4: Experiment with Different Fonts and Weights
Curved text can look different depending on the font and weight you choose. Experiment with various fonts and weights to find the one that best complements your design and maintains readability. To access different font options, select the text and use the “Character” panel or the “Control” panel to browse through the available choices.
Tip 5: Adjust the Starting and Ending Points of the Text
Control the position of your curved text on the path by adjusting its starting and ending points. Select the text with the “Type on a Path” tool, then click and drag the small bracket-like handles (inward or outward) that appear at the beginning and end of the path.
This allows you to precisely position the text along the curve, ensuring that it looks balanced and visually appealing.
Final Thoughts
Curving text in InDesign is a versatile technique that can help you create unique and attractive designs. With practice, you’ll be able to manipulate text along paths and shapes to enhance your layouts and make your typography more dynamic. Don’t be afraid to experiment with different shapes, paths, and text formatting options to find the perfect combination for your projects.