


Recently, my team took on a project to build an online, video-based learning platform. The project, called Jamstack Explorers, is a Jamstack app powered by Sanity and Next.js. We knew that the success of this project relied on making the editing experience easy for collaborators from different companies and roles, as well as retaining the flexibility to add custom components as needed.

To accomplish this, we decided to author content using MDX, which is Markdown with the option to include custom components. For our audience, Markdown is a standard approach to writing content: it’s how we format GitHub comments, Notion docs, Slack messages (kinda), and many other tools. The custom MDX components are optional and their usage is similar to shortcodes in WordPress and templating languages.
To make it possible to collaborate with contributors from anywhere, we decided to use Sanity as our content management system (CMS).
But how could we write MDX in Sanity? In this tutorial, we’ll break down how we set up MDX support in Sanity, and how to load and render that MDX in Next.js — powered website using a reduced example.
TL;DR
If you want to jump straight to the results, here are some helpful links:
How To Write Content Using MDX In Sanity
Our first step is to get our content management workflow set up. In this section, we’ll walk through setting up a new Sanity instance, adding support for writing MDX, and creating a public, read-only API that we can use to load our content into a website for display.
Create A New Sanity Instance
If you don’t already have a Sanity instance set up, let’s start with that. If you do already have a Sanity instance, skip ahead to the next section.
Our first step is to install the Sanity CLI globally, which allows us to install, configure, and run Sanity locally.
# install the Sanity CLI
npm i -g @sanity/cli
In your project folder, create a new directory called sanity, move into it, and run Sanity’s init command to create a new project.
# create a new directory to contain Sanity files
mkdir sanity
cd sanity/
sanity init
The init command will ask a series of questions. You can choose whatever makes sense for your project, but in this example we’ll use the following options:
- Choose a project name: Sanity Next MDX Example.
- Choose the default dataset configuration (“production”).
- Use the default project output path (the current directory).
- Choose “clean project” from the template options.
Install The Markdown Plugin For Sanity
By default, Sanity doesn’t have Markdown support. Fortunately, there’s a ready-made Sanity plugin for Markdown support that we can install and configure with a single command:
# add the Markdown plugin
sanity install markdown
This command will install the plugin and add the appropriate configuration to your Sanity instance to make it available for use.
Define A Custom Schema With A Markdown Input
In Sanity, we control every content type and input using schemas. This is one of my favorite features about Sanity, because it means that I have fine-grained control over what each content type stores, how that content is processed, and even how the content preview is built.
For this example, we’re going to create a simple page structure with a title, a slug to be used in the page URL, and a content area that expects Markdown.
Create this schema by adding a new file at sanity/schemas/page.js and adding the following code:
export default { name: 'page', title: 'Page', type: 'document', fields: [ { name: 'title', title: 'Page Title', type: 'string', validation: (Rule) => Rule.required(), }, { name: 'slug', title: 'Slug', type: 'slug', validation: (Rule) => Rule.required(), options: { source: 'title', maxLength: 96, }, }, { name: 'content', title: 'Content', type: 'markdown', }, ],
};
We start by giving the whole content type a name and title. The type of document tells Sanity that this should be displayed at the top level of the Sanity Studio as a content type someone can create.
Each field also needs a name, title, and type. We can optionally provide validation rules and other options, such as giving the slug a max length and allowing it to be generated from the title value.
Add A Custom Schema To Sanity’s Configuration
After our schema is defined, we need to tell Sanity to use it. We do this by importing the schema into sanity/schemas/schema.js, then adding it to the types array passed to createSchema.
 // First, we must import the schema creator import createSchema from 'part:@sanity/base/schema-creator'; // Then import schema types from any plugins that might expose them import schemaTypes from 'all:part:@sanity/base/schema-type'; + // Import custom schema types here
+ import page from './page'; // Then we give our schema to the builder and provide the result to Sanity export default createSchema({ // We name our schema name: 'default', // Then proceed to concatenate our document type // to the ones provided by any plugins that are installed types: schemaTypes.concat([
- /* Your types here! */
+ page, ]), });
This puts our page schema into Sanity’s startup configuration, which means we’ll be able to create pages once we start Sanity up!
Run Sanity Studio Locally
Now that we have a schema defined and configured, we can start Sanity locally.
sanity startOnce it’s running, we can open Sanity Studio at http://localhost:3333 on our local machine.
When we visit that URL, we’ll need to log in the first time. Use your preferred account (e.g. GitHub) to authenticate. Once you get logged in, you’ll see the Studio dashboard, which looks pretty barebones.
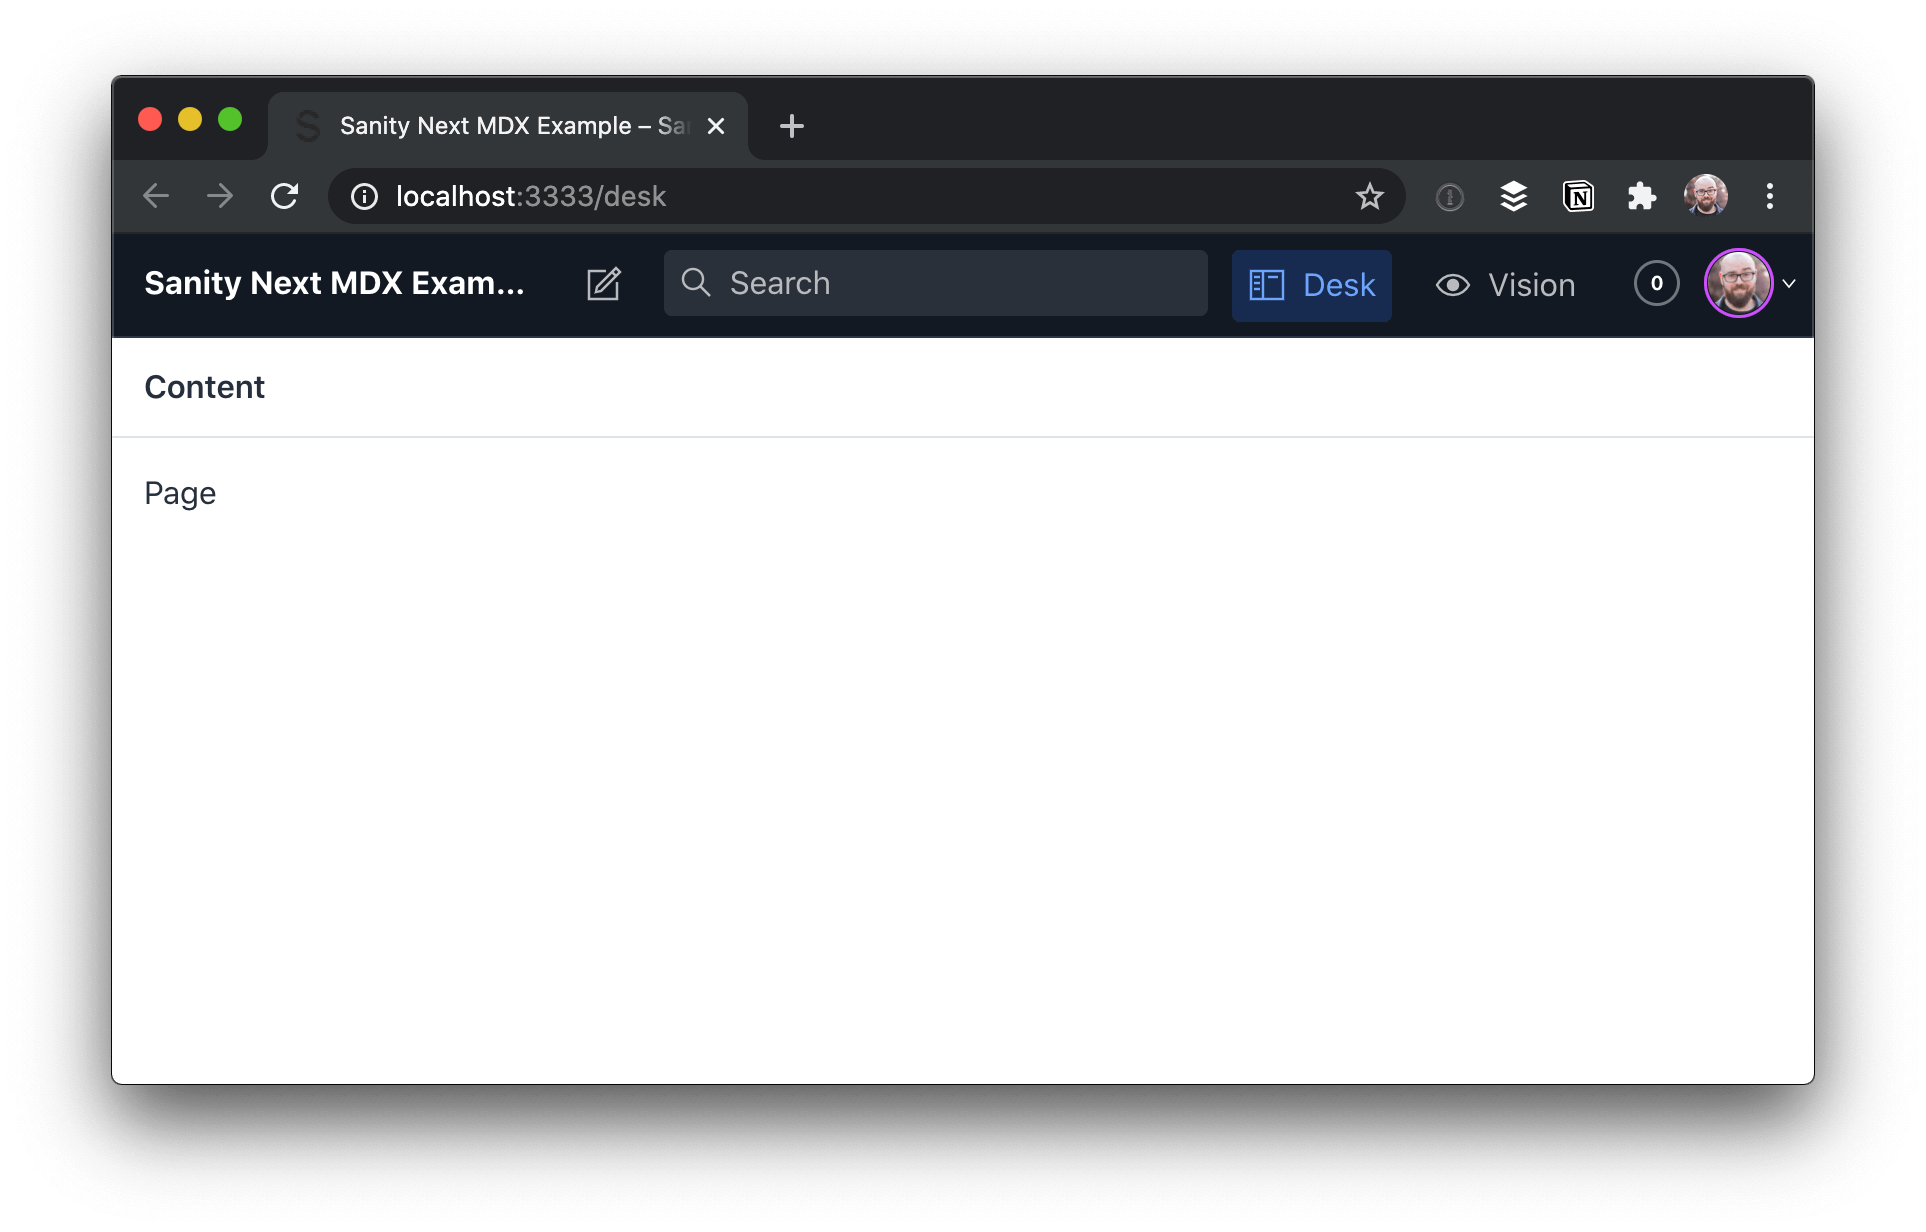
To add a new page, click “Page”, then the pencil icon at the top-left.
Add a title and slug, then write some Markdown with MDX in the content area:
This is written in [Markdown](https://www.markdownguide.org/basic-syntax/). But what’s this? <Callout> Oh dang! Is this a React component in the middle of our content? 😱 </Callout> Holy buckets! That’s amazing!Heads up! The empty line between the MDX component and the Markdown it contains is required. Otherwise the Markdown won’t be parsed. This will be fixed in MDX v2.

Once you have the content in place, click “Publish” to make it available.
Deploy The Sanity Studio To A Production URL
In order to make edits to the site’s data without having to run the code locally, we need to deploy the Sanity Studio. The Sanity CLI makes this possible with a single command:
sanity deployChoose a hostname for the site, which will be used in the URL. After that, it will be deployed and reachable at your own custom link.
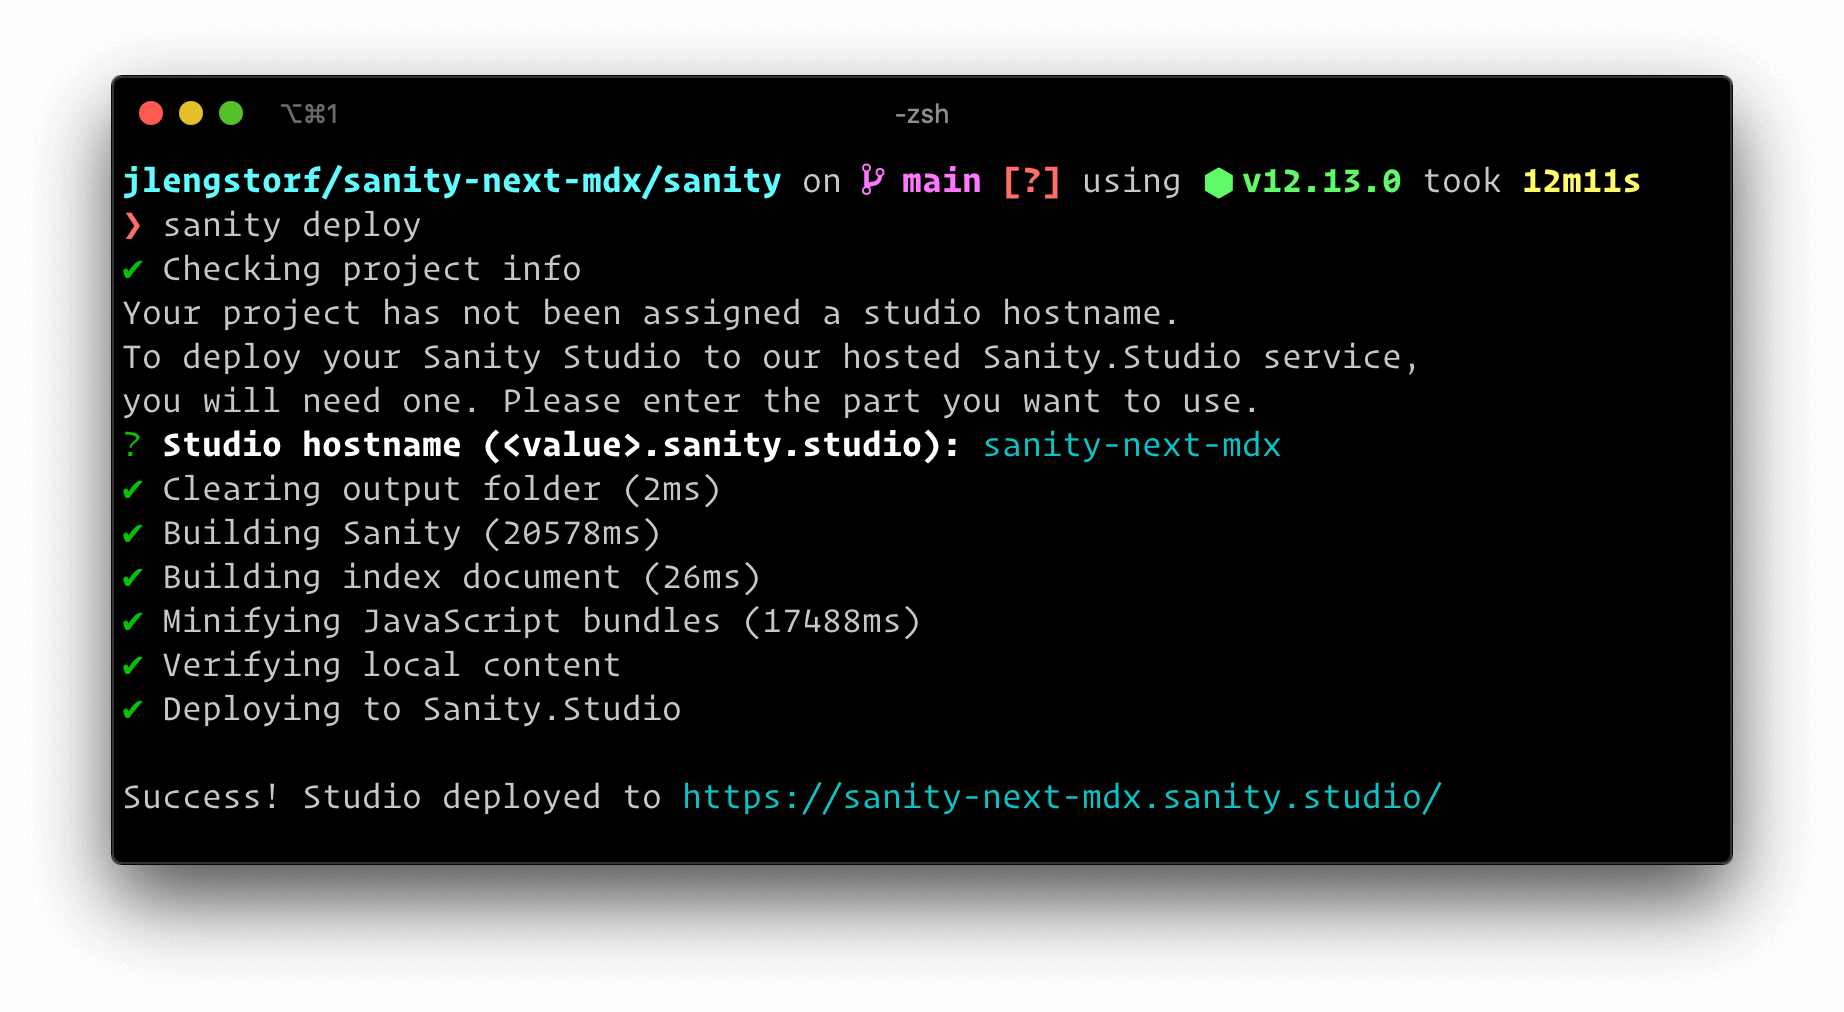
This provides a production URL for content editors to log in and make changes to the site content.
Make Sanity Content Available Via GraphQL
Sanity ships with support for GraphQL, which we’ll use to load our page data into our site’s front-end. To enable this, we need to deploy a GraphQL API, which is another one-liner:
sanity graphql deployWe can choose to enable a GraphQL Playground, which gives us a browser-based data explorer. This is extremely handy for testing queries.

Store the GraphQL URL — you’ll need it to load the data into Next.js!
https://sqqecrvt.api.sanity.io/v1/graphql/production/defaultThe GraphQL API is read-only for published content by default, so we don’t need to worry about keeping this secret — everything that this API returns is published, which means it’s what we want people to see.
Test Sanity GraphQL Queries In The Browser
By opening the URL of our GraphQL API, we’re able to test out GraphQL queries to make sure we’re getting the data we expect. These queries are copy-pasteable into our code.
To load our page data, we can build the following query using the “schema” tab at the right-hand side as a reference.
query AllPages { allPage { title slug { current } content }
}
This query loads all the pages published in Sanity, returning the title, current slug, and content for each. If we run this in the playground by pressing the play button, we can see our page returned.

Now that we’ve got page data with MDX in it coming back from Sanity, we’re ready to build a site using it!
In the next section, we’ll create an Next.js site that loads data from Sanity and renders our MDX content properly.
Display MDX In Next.js From Sanity
In an empty directory, start by initializing a new package.json, then install Next, React, and a package called next-mdx-remote.
# create a new package.json with the default options
npm init -y # install the packages we need for this project
npm i next react react-dom next-mdx-remote
Inside package.json, add a script to run next dev:
 { "name": "sanity-next-mdx", "version": "1.0.0", "scripts": {
+ "dev": "next dev" }, "author": "Jason Lengstorf <jason@lengstorf.com>", "license": "ISC", "dependencies": { "next": "^10.0.2", "next-mdx-remote": "^1.0.0", "react": "^17.0.1", "react-dom": "^17.0.1" }
Create React Components To Use In MDX Content
In our page content, we used the <Callout> component to wrap some of our Markdown. MDX works by combining React components with Markdown, which means our first step is to define the React component our MDX expects.
Create a Callout component at src/components/callout.js:
export default function Callout({ children }) { return ( <div style={{ padding: '0 1rem', background: 'lightblue', border: '1px solid blue', borderRadius: '0.5rem', }} > {children} </div> );
}
This component adds a blue box around content that we want to call out for extra attention.
Send GraphQL Queries Using The Fetch API
It may not be obvious, but you don’t need a special library to send GraphQL queries! It’s possible to send a query to a GraphQL API using the browser’s built-in Fetch API.
Since we’ll be sending a few GraphQL queries in our site, let’s add a utility function that handles this so we don’t have to duplicate this code in a bunch of places.
Add a utility function to fetch Sanity data using the Fetch API at src/utils/sanity.js:
export async function getSanityContent({ query, variables = {} }) { const { data } = await fetch( 'https://sqqecrvt.api.sanity.io/v1/graphql/production/default', { method: 'POST', headers: { 'Content-Type': 'application/json', }, body: JSON.stringify({ query, variables, }), }, ).then((response) => response.json()); return data;
}
The first argument is the Sanity GraphQL URL that Sanity returned when we deployed the GraphQL API.
GraphQL queries are always sent using the POST method and the application/json content type header.
The body of a GraphQL request is a stringified JSON object with two properties: query, which contains the query we want to execute as a string; and variables, which is an object containing any query variables we want to pass into the GraphQL query.
The response will be JSON, so we need to handle that in the .then for the query result, and then we can destructure the result to get to the data inside. In a production app, we’d want to check for errors in the result as well and display those errors in a helpful way, but this is a post about MDX, not GraphQL, so #yolo.
Heads up! The Fetch API is great for simple use cases, but as your app becomes more complex you’ll probably want to look into the benefits of using a GraphQL-specific tool like Apollo or urql.
Create A Listing Of All Pages From Sanity In Next.js
To start, let’s make a list of all the pages published in Sanity, as well as a link to their slug (which won’t work just yet).
Create a new file at src/pages/index.js and put the following code inside:
import Link from 'next/link';
import { getSanityContent } from '../utils/sanity'; export default function Index({ pages }) { return ( <div> <h1>This Site Loads MDX From Sanity.io</h1> <p>View any of these pages to see it in action:</p> <ul> {pages.map(({ title, slug }) => ( <li key={slug}> <Link href={`/${slug}`}> <a>{title}</a> </Link> </li> ))} </ul> </div> );
} export async function getStaticProps() { const data = await getSanityContent({ query: ` query AllPages { allPage { title slug { current } } } `, }); const pages = data.allPage.map((page) => ({ title: page.title, slug: page.slug.current, })); return { props: { pages }, };
}
In getStaticProps we call the getSanityContent utility with a query that loads the title and slug of all pages in Sanity. We then map over the page data to create a simplified object with a title and slug property for each page and return that array as a pages prop.
The Index component to display this page receives that page’s prop, so we map over that to output an unordered list of links to the pages.
Start the site with npm run dev and open http://localhost:3000 to see the work in progress.

If we click a page link right now, we’ll get a 404 error. In the next section we’ll fix that!
Generate Pages Programatically In Next.js From CMS Data
Next.js supports dynamic routes, so let’s set up a new file to catch all pages except our home page at src/pages/[page].js.
In this file, we need to tell Next what the slugs are that it needs to generate using the getStaticPaths function.
To load the static content for these pages, we need to use getStaticProps, which will receive the current page slug in params.page.
To help visualize what’s happening, we’ll pass the slug through to our page and log the props out on screen for now.
import { getSanityContent } from '../utils/sanity'; export default function Page(props) { return <pre>{JSON.stringify(props, null, 2)}</pre>;
} export async function getStaticProps({ params }) { return { props: { slug: params.page, }, };
} export async function getStaticPaths() { const data = await getSanityContent({ query: ` query AllPages { allPage { slug { current } } } `, }); const pages = data.allPage; return { paths: pages.map((p) => `/${p.slug.current}`), fallback: false, };
}
If the server is already running this will reload automatically. If not, run npm run dev and click one of the page links on http://localhost:3000 to see the dynamic route in action.

Load Page Data From Sanity For The Current Page Slug In Next.js
Now that we have the page slug, we can send a request to Sanity to load the content for that page.
Using the getSanityContent utility function, send a query that loads the current page using its slug, then pull out just the page’s data and return that in the props.
 export async function getStaticProps({ params }) {
+ const data = await getSanityContent({
+ query: `
+ query PageBySlug($slug: String!) {
+ allPage(where: { slug: { current: { eq: $slug } } }) {
+ title
+ content
+ }
+ }
+ `,
+ variables: {
+ slug: params.page,
+ },
+ });
+
+ const [pageData] = data.allPage; return { props: {
- slug: params.page,
+ pageData, }, }; }
After reloading the page, we can see that the MDX content is loaded, but it hasn’t been processed yet.

Render MDX From A CMS In Next.js With Next-mdx-remote
To render the MDX, we need to perform two steps:
-
For the build-time processing of MDX, we need to render the MDX to a string. This will turn the Markdown into HTML and ensure that the React components are executable. This is done by passing the content as a string into
renderToStringalong with an object containing the React components we want to be available in MDX content. -
For the client-side rendering of MDX, we hydrate the MDX by passing in the rendered string and the React components. This makes the components available to the browser and unlocks interactivity and React features.
While this might feel like doing the work twice, these are two distinct processes that allow us to both create fully rendered HTML markup that works without JavaScript enabled and the dynamic, client-side functionality that JavaScript provides.
Make the following changes to src/pages/[page].js to render and hydrate MDX:
+ import hydrate from 'next-mdx-remote/hydrate';
+ import renderToString from 'next-mdx-remote/render-to-string'; import { getSanityContent } from '../utils/sanity';
+ import Callout from '../components/callout'; - export default function Page(props) {
- return <pre>{JSON.stringify(props, null, 2)}</pre>;
+ export default function Page({ title, content }) {
+ const renderedContent = hydrate(content, {
+ components: {
+ Callout,
+ },
+ });
+
+ return (
+ <div>
+ <h1>{title}</h1>
+ {renderedContent}
+ </div>
+ ); } export async function getStaticProps({ params }) { const data = await getSanityContent({ query: ` query PageBySlug($slug: String!) { allPage(where: { slug: { current: { eq: $slug } } }) { title content } } `, variables: { slug: params.page, }, }); const [pageData] = data.allPage; + const content = await renderToString(pageData.content, {
+ components: { Callout },
+ }); return { props: {
- pageData,
+ title: pageData.title,
+ content, }, }; } export async function getStaticPaths() { const data = await getSanityContent({ query: ` query AllPages { allPage { slug { current } } } `, }); const pages = data.allPage; return { paths: pages.map((p) => `/${p.slug.current}`), fallback: false, }; }
After saving these changes, reload the browser and we can see the page content being rendered properly, custom React components and all!

Use MDX With Sanity And Next.js For Flexible Content Workflows
Now that this code is set up, content editors can quickly write content using MDX to enable the speed of Markdown with the flexibility of custom React components, all from Sanity! The site is set up to generate all the pages published in Sanity, so unless we want to add new custom components we don’t need to touch the Next.js code at all to publish new pages.
What I love about this workflow is that it lets me keep my favorite parts of several tools: I really like writing content in Markdown, but my content also needs more flexibility than the standard Markdown syntax provides; I like building websites with React, but I don’t like managing content in Git.
Beyond this, I also have access to the huge amount of customization made available in both the Sanity and React ecosystems, which feels like having my cake and eating it, too.
If you’re looking for a new content management workflow, I hope you enjoy this one as much as I do!
What’s Next?
Now that you’ve got a Next site using MDX from Sanity, you may want to go further with these tutorials and resources:
What will you build with this workflow? Let me know on Twitter!
(yk)